Refresh that rental
Are you currently in a cosy rental but the idea of a new kitchen excites you? We all know with rentals we are quite limited with what we can and can’t do, this can be a bit of an itch we NEED to scratch – especially after going through all the possible ideas for design and what our dream kitchen would be when we win lotto. Good news is; I have the perfect guide to achieving the feel of a new kitchen without overstepping our limitations.
This first step is a bit of a questionable one until you read the reasoning as to why I have added this in, start sprucing up the room by adding a plain, medium sized mirror in the kitchen it does in fact achieve all sorts of visual positivity. It’s an unexpected element in the kitchen so it instantly makes a statement. If you have a window, it’ll help spread the light around. If you don’t have a window, it’ll be even more vital for reflecting what light you do have in the room.
Create a temporary splashback in the kitchen, a lot of times rental kitchens don’t have any sort of splashback as they are just done to be as basic as can be whilst focusing on that practicality but whose to say you can’t spice it up a bit? You may need to run this past your landlord, but you can achieve this by using a small cut of a detailed/patterned wallpaper in which you can buy from your local paint shops (& even hardware stores if they stock wallpaper!) super easy yet super fun way of adding a dash of your style, temporally.
Do you have old, raggedy flooring that you just want to take a jack hammer to get rid of the awful eye sight? Use a rug – you can get as creative as you like with all these different sorts of rugs out there and you can use any size to cover how ever much you like (bonus with this is you can take this rug with you if you decide to move or even change it up when desired with another rug! Winning)
Boring cabinets? Colour not quite up your alley or isn’t quite linking in with your other colour scheme going on in the rest of the house? Try getting some contact paper, temp wall paper or even vinyl to give your cabinetry a new beginning – just be sure that you can remove whichever product you use without damaging the underneath and, some may need consent from the landlord.
As we all know and have seen how amazing open shelving looks in the kitchen you may not quite have that in a rental, unfortunately there is no real way to have proper floating shelves without getting consent and spending some money to achieve that BUT I can help you fake this look in a more easier, affordable way and this involves taking the doors off your cabinetry where you desire to have open shelving. Of course, this will look a bit different to open shelving, but it is a pretty close idea in comparison and it keeps the area looking more open and modern (just be sure to store those doors safely away and easy to put back on if needed.)
Add a magnetic knife block or a utensil wall holder, these are easy to install and can be taken off when you no longer need that – this looks edgy and keeps storage under control.
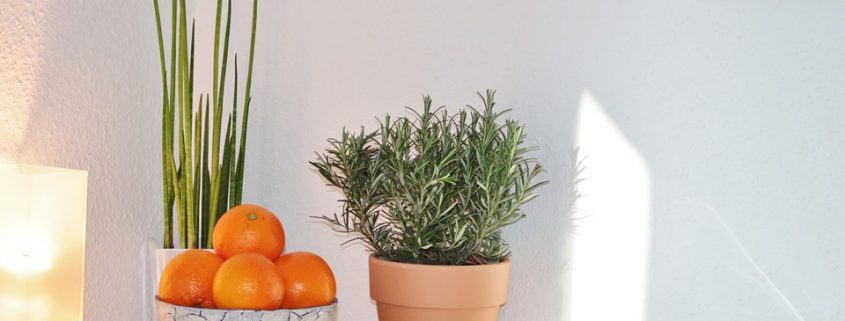
Add some plants to jazz up the positive vibes in your kitchen, plants can uplift your mind set and feel more relaxed – you can even add some herbs and spices so when your cooking up a storm you have this right at your fingertips! Super cute idea and an amazing way to spruce up your kitchen.
Don’t have a ton of space do your prep work? Consider DIYing or buying a chopping board that covers your kitchen sink or stove when you’re not using them to add extra space to work. this creates more space and you can store this easily – another advanced option is to DIY your own kitchen island with wheels! look ideas up on Pinterest as there are so many we couldn’t just choose one!
Hopefully you feel like your in the next best thing to your dream kitchen in your rental kitchen.