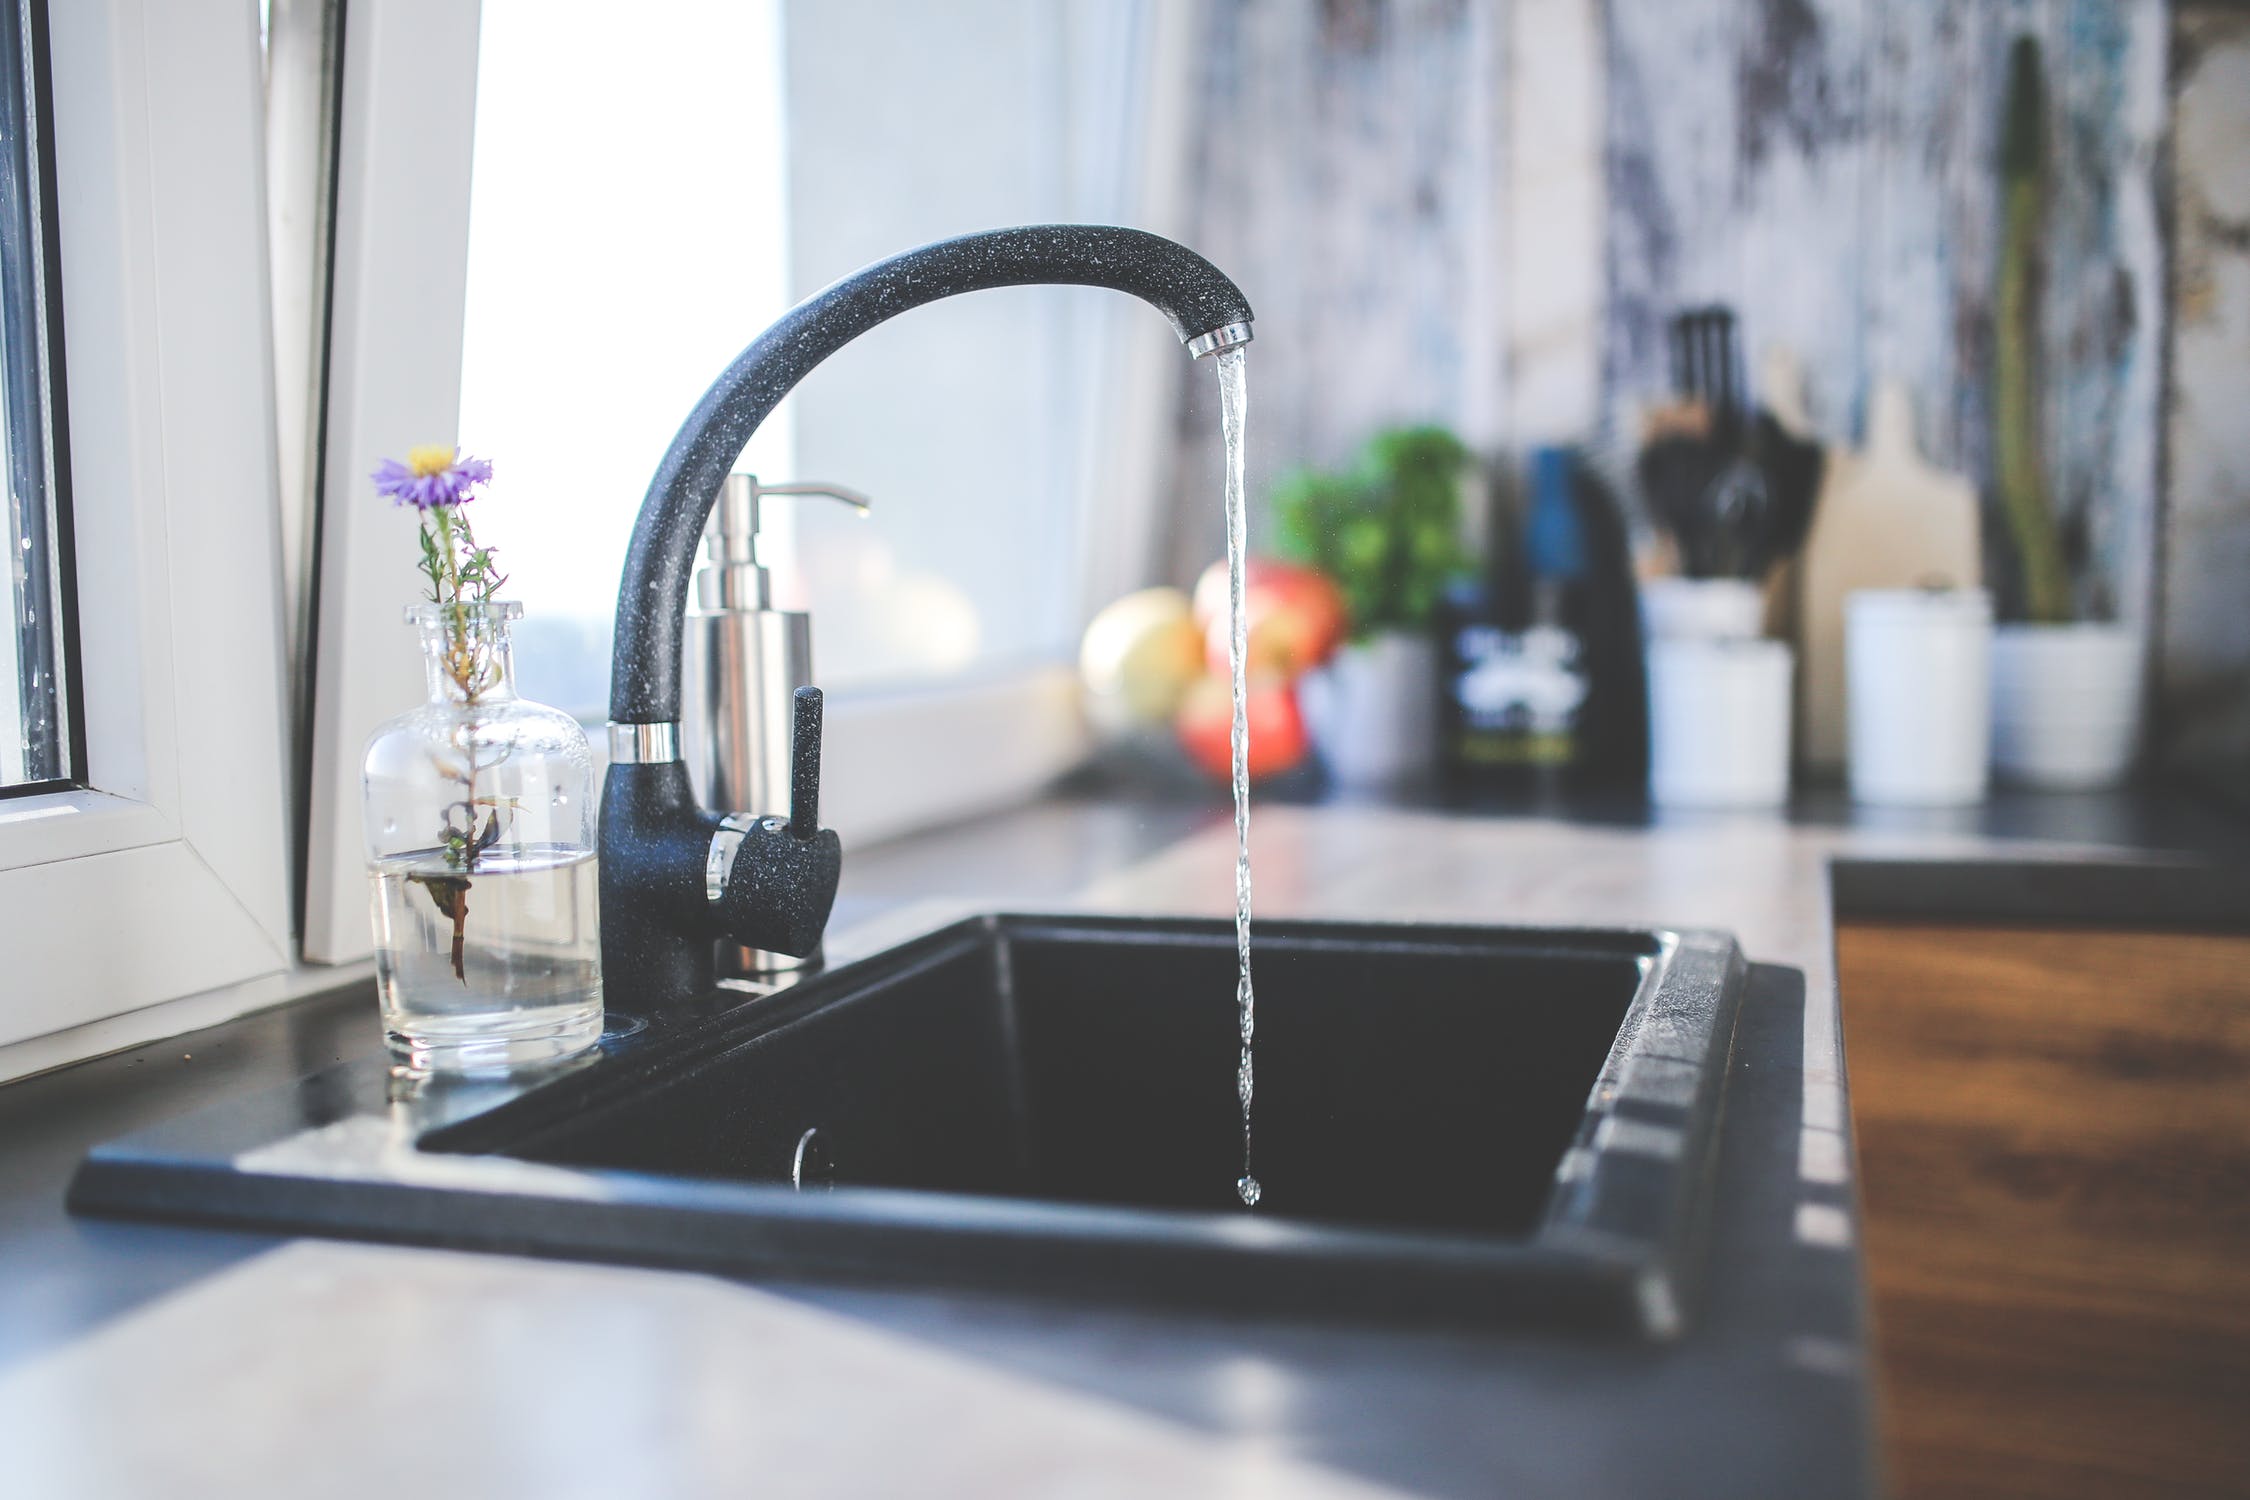
Posts

Choosing a tap for your design

Whether you’re building your first home, renovating your current house, the pressure of choosing the right tap can be rather daunting. The kitchen tap will be one of the most frequently used items in your kitchen, with quite a large amount of choice on the market today there are three considerations we encourage you to think about when it comes to choosing your tap.

Positioning – Where exactly in the kitchen is your tap going to be located? On a kitchen island? Directly under a window? To the left or right of your sink? The position you are wanting your tap to be plays a mega important roll in making a decision, for example, if you wanted your tap place in your kitchen island – did you want it to be an eyesore or blend in as much as possible? If it is going under your window – would you want it sitting nicely under the windowsill line or wanting it sitting over? The positioning of your tap will have a huge impact of the final decision of which tap you can put in the space you want it.

Your type of sink – now this also plays a great role in choosing the tap – there are many questions that come with this like, do you want them the same color or different? Will your sink be a double bowl or a single? The type of sink you choose generally makes it easier to eliminate certain colours or functions. All in all – with the final say of the range you are now can work with given the position and sink type, it comes down to personal preference. There are plenty more components to a tap nowadays. For example, do you want a pull-out spray, or a tap that changes water pressure? A pull-down spray is a great option for double bowl sinks or laundry sinks whereas single bowl sinks smaller than 500mm (width) are best suited for normal taps.

Color Palette – The color palette of your kitchen is important to consider when choosing a tap finish. Matching in conjunction with your benchtop, cabinetry, and all other aspects in your kitchen. Brass finishes are becoming increasingly more preferred, but there are a few things you should learn before purchasing. With a vast number of brass taps available, choosing the right one for your space can be a bit nerve wracking, but don’t worry – consider the look of your kitchen long term. Black & White colored tapware has also spiked in popularity. Black & White are two very powerful colors and can add a degree of sophistication to a space.


Delicious, Tummy-warming Apple Crumble

Delicious, Tummy-warming Apple Crumble

After a quick, cheap evening treat for after dinner? i bet you probably have all the ingredients in your household as the recipe is SO SIMPLE and just absolutely a family favorite to warm your bellies in this cold winter chill.

  • ½ cup plain flour
  • ¼ cup rolled oats
  • ¼ cup desiccated coconut
  • ¼ cup Soft Brown Sugar
  • ½ tsp cinnamon
  • 75g butter
  • 5-6 Apples
  • 2 Tbsp Golden Syrup
  • 2 Tbsp Raw Sugar

Preheat oven to 180°C on fan-bake.

In a large mixing bowl, mix together the flour, oats, coconut, brown sugar & cinnamon all together and the rub the butter into the mixture with your hands until it becomes crumbly.

Peel and cut the apples into thin slices (not too thin!) and place them in the oven proof dish – drizzle some golden syrup over the apples.

Spread the crumble mix evenly on top of the apples to completely cover the oven dish and sprinkle your raw sugar over the top to give it the caramelised taste.

Cook for 30-40 minutes or until the apples are cooked. Serve with vanilla bean ice cream, freshly whipped cream or warm custard for a delicious winters desert!

TIP* Add in some additional fruit with the apple, plums, peaches, pears or mixed berries would complement this just superbly!  

Children cooking in the kitchen

Keep the Kitchen child safe

When it comes to getting a new kitchen, we often forget about the wider aspects to the design process.

Children can play a major part in the design process – particularly the younger ones. They are very compelled by the kitchen and are heavily enticed from all the colourful things you put in and take out of cupboards, drawers & the fridge.

Kids love to be wherever you are – INSTANTLY if they see you’re about to do something they want to help with and we all know they love baking/cooking (i’m pretty convinced it’s because they get to have multiple taste tests and get the rights to licking the bowl!) this is why it becomes important as they are spending a chunk of time in the kitchen also and it can be a jungle for them in there with so many things to grab and play with.

While you spend quite a bit of time in the kitchen, there’s no way of having it child-free, but the bonus here is that we can make it as safe as possible so they minimize any head bumps on sharp corners, jammed fingers in the cabinetry – YOU NAME IT! they will find a way to do it if they can.

Talking to your designer and making sure this is an important design aspect to incorporate is very much achievable while still having the kitchens of your dreams, it may mean having the rounded edges on the bench tops opposed to the square edge or a rounded handle instead of a sharper edged one would be the way to go but the options are super flexible when going through a skilled designer (like our lovely designers here at Next Edition Kitchens!) you often won’t pick up on what else needs to be discussed but the knowledge the designers have is incredible and will have you walking away feeling like you’re in great hands as are your children.

Keep in mind, there are many little gadgets you can purchase to assist the safety in the kitchen if you aren’t designing or renovating. Click here for ideas.

Composting

How-to: Maintain a compost bin

Do you have a garden and have been thinking of incorporating a good ole’ compost to the mix? this is such a great idea if you are after a little project to keep you busy and an added bonus is that your garden will thank you with delicious fruit, vegetables and flowers that have been absolutely soaking in all the nutrients from the emptied compost.


What exactly is compost?

Compost is simply decomposed organic waste from mainly food scraps. It is nature’s way of creating an added boost to crops and general gardens. All you need to keep feeding your compost is your kitchen food scraps and even garden waste – how easy? in just 2 – 3 months your supply will be at the stages of an ongoing steady fertilizer that’s packed with nutrients for your garden.


What type of compost bin is best?

A plastic bin in which you can purchase from your local hardware shop is perfect for your smaller compost to scale but if you are wanting a larger to scale bin, go for the wooden ones. You can build a bin yourself from googling a DIY step-by-step guide. You can also just start a heap on the ground but the choice is totally up to you!


Where do i place my bin?

It is a good idea to place the bin in place away from the house. it will need to be sheltered by intense heat and wind.


Making the compost:

Once you’ve decided where you’re going to place your compost bin, it’s time to get started with the fun stuff.
Add your organic material in layers to create a balance of carbon and nitrogen.
Start by doing a layer of carbon – your brown material: dried leaves, twigs, newspaper etc. Next add a nitrogen layer – your green material: plant trimmings,
grass clippings, anything green and leafy.
Adding a product like lime to each layer as you prepare your heap will accelerate the composting and help neutralize acidity, plus it has the added bonus of helping to keep flies away. Keep adding alternate layers, then add water and cover the heap to enable it to decompose quickly. Compost needs to be turned regularly to aerate and help the decomposition process.
What NOT to put in your compost:
-Tea and Coffee Bags: If you are wanting to place Tea and coffee grounds into your compost, that is absolutely fine but please make sure you do not put the bags in aswell – these bags generally contain synthetic fibers that do not break down in a compost pile and can contain some iffy chemicals you do not want in your soil.
Citrus Peels & Onions: While fruit and vegetable scraps are the main ingredient to making some fantastic fertilizer there are some food scraps you should steer clear from your compost, these include Orange peels & Onions the reason i place these in bold is because it is such an easy food scrap to slip past you and weasel their way into the compost bin, perhaps placing a sign on the compost bin to remind you not to put them in would be beneficial?
Unfortunately, the natural chemicals and acidity in orange peels and onions can kill worms which of course slows the process down as the little worms and other microorganisms actually really con tribute to the outcome of your compost. Plus, unless you take time to cut everything down into smaller pieces – they take longer to decompose which results in a longer wait until you can use your fertilizer.
Meat & Fish: These will of course, decompose fine and have nutrients that would be a good addition to your soil, it will unfortunately attract rodents like Mice, Rats, Cats, Dogs etc who would carelessly ransack your bin to eat them.
The smell of decaying meat may annoy you and possibly your neighbors as well!
Coal ash: The ash left from the fireplace should most certainly not be added to your compost pile, it contains quite a significant amount of sulfur as to make the soil excessively acidic, which we can confirm will harm your plants. Wood ash can be added in small amounts but do not add coal ash!
Sawdust from TREATED wood: While untreated, natural wood sawdust can be a great addition to your compost pile. The reason that treated, polished and vanished wood is not a great addition is because the toxic compounds wont be able to break down in the compost process and can negatively affect the microorganism activity and plant health.
-Large branches: Large branches and twigs will take forever to decompose which in conclusion will slow down the process, it may be a bit of a pain to lengthen the process by cutting them down to be smaller but it will allow you to use the compost for your garden a lot quicker. The smaller the branches, the quicker the breakdown cycle is.


Alternatively,  you can start a branch pile at the back of your house where its purely dedicated to branches, twigs etc which will decompose over the course of a couple of years. A branch pile is however, a great habitat for smaller rodents.


Added on tips:

  • Always keep your pile damp but not saturated.
  • If you are adding food scraps bury deep in the pile.
  • Do mix your lawn clippings with your food scraps, grass tends to compact which may prevent the air flow through the pile.
  • Ensure you compost gets some sunshine but not too much.


Trends 2019

2019 Trends to lookout for

As we all know, the kitchen truly is the heart of the home, the place where you make memories and learn skills daily, there is never one whole day you don’t use the kitchen. Fortunately, a kitchen isn’t such a hard room to style with all the lovely options and ideas out there – the options truly are endless!

When it comes to the kitchen, you want practicality but also a great look that pulls everyone’s attention as soon as they walk in the room. With styles continuously coming and going with the years, we decided it would be a great opportunity to write a guide of trends to look out for in 2019!

Whether you are building a brand-new house, renovating your current or just sprucing up the area a pop of colour is what everyone is leaning towards for 2019 – this is the year to be bright, bold and adventurous! Although having white in your kitchen is still very popular to be creating an open and clean feeling kitchen. But 2019 is going to see bits of colour popping up in white kitchens whether you incorporate this through a beautifully colour splashback or even get creative and buy some coloured cooking utensils/appliances! Paint an island or accent wall – the options go on and on.

Let’s talk about Quartz – we all dream on having a stunning Quartz piece in our homes, but this is the year to take the plunge and go for it, 2019 is all about statements and this just ticks every box. Not only is it easy on the eye but the durability is phenomenal, easy to maintain and a more affordable option opposed to granite.

Ceaserstone Quartz Benchtop

Ceaserstone Quartz Benchtop in White Quartz


Being 2019 and all, we want to go the extra, modern mile and this may mean no handles is the way to go! No, seriously – say goodbye to handles because push-touch is your new best friend, if you prefer to have cut-outs, they are still very stylish and all in for this year’s trend. Or opt for indents along the base of the cabinet door to keep the indents tucked away and out of sight.

Push touch - No handles

Push touch – No handles – Next Edition Kitchens


Open shelving has been around for a few years as a way to showcase your attractive dishes. We all love open shelving because of the modern, classic look it gives the room – this is among many different Kitchen designers lists for trends in 2019 and to be fair – we can’t argue otherwise, it’s a great idea to make your kitchen space to appear bigger than it is.

Cupboards

Open shelving


Goodbye Gloss and hello Matte! Matte is such a great aspect to include in the kitchen it just blends ever so smoothly and looks exquisite. There is a bonus here which is that matte is more forgiving with showing fingerprint markings as easily as gloss can. We also predict these will be around in the trends for many more years to come.

Soft Matte Finish on Kitchen

Soft Matte Finish on Kitchen


Wait, what? Stoves and rangehoods in….colour?? Yes, that’s right – this goes back to reason #1 as to why we are adding colourful options to the list of trends for 2019 – it is such a fun way to brighten up your style whilst adding a wonderful statement piece.

Pink Oven

Pink Oven


Gold or copper are dashing their way into 2019 with a great deal of attention, these colours work well in most kitchens whether you have dark or light benchtops, do use these in small doses – we recommend handles or sinks/tapware!

Aurora Copper Sink and tap angled - Mercer sinks

Aurora Copper Sink and tap angled – Mercer sinks


Funky coloured/texured Splashbacks are all in for 2019, the wonderful patterns these have to choose from is absolutely tempting and would compliment a wonderful kitchen, could this be your statement piece?

Next Edition Kitchens - Splashback

Next Edition Kitchens – Splashback


Thanks for reading, let us know what you’d like to see in the next blogs!

Lights

Lights In The Kitchen Guide

Lights in the Kitchen can be tricky with the different types of lighting out there as an option but with the help from our designers, we can help point you into the right direction.

Every kitchen deserves its own personal complimentary aspect to highlight what a breath-taking project it is, whether you have just done a few renovations/DIY upgrades to what is current or even having a newly built kitchen – this is why lighting in the kitchen is a great opportunity to take on.

Having the kitchen complete and fresh is like you are floating on cloud 9, you come to realize all the effort, time and money gone into achieving this so why not somehow emphasize all that hard thinking and decision making, the cost of material and also the hard work gone in to getting the job done? Lighting in the kitchen is the answer and not only is it stylish – it’s also very practical.

Having a lighting plan in your kitchen can make the chef’s life an absolute breeze with the bright task lighting, for guests to socialize with a lovely calming and elegant ambient lighting, lastly, we can’t forget lighting for the well-thought-out architecture of your kitchen to really shine with accent lighting.
Together, these lighting layers will show off all your kitchen has to offer.

Ambient lighting:
This is like no other lighting that can come from such a pure, organic source that is free: the sunshine! Early mornings usually greet you with a slap in the face of sunshine (a good slap in the face) this is always enough to fill each room everyday apart from when the sun says goodbye for the day and the darkness creeps in.
The right ceiling lighting can be utilized to give off just the right amount of illumination needed. The specific types of artificial ambient kitchen lighting include (but are not limited to) chandeliers, pendant lights, recessed lighting and flush mounts.

While ambient lighting is used to make it easier for you to navigate throughout the kitchen, it often leaves shadows in areas that require more focus. With the help of task lighting, work surfaces and cabinetry are properly illuminated so you can safely prepare meals, read recipes, and easily spot ingredients on a shelf.

What is Accent lighting?
Accent lighting focuses light on a particular area of the room or an object. It is often used to highlight art or other important displays. Common types of accent lights include wall sconces, floodlights, recessed lights, torchère lamps, or track lighting. The brighter light from the accent lamp creates a statement to any room.

We recommend puck lights to really emphasize nicely those glass front cabinets, much like in a china cabinet or your end cabinets.

– Toe-kick lights to gain attention on flooring that have some sort of texture or design. They are also very helpful to those who like a midnight snack but don’t want bright overhead lighting waking them up.
– A table lamp on the bench-top adds a lovely glow to give that illusion to soften the hard surfaces of a kitchen. This looks great in the more quieter areas of your kitchen, keeping it away from the prep stations and kitchen sink.

Task lighting:
Task lighting is exactly what it sounds like: lighting to help you accomplish the tasks you set out to do in your kitchen. Whether it’s preparing meals, washing dishes, paying bills, or helping kids with homework, all of these jobs would be difficult to complete with poor lighting. Task lighting sources include:
– Recessed or “can” lights – We strongly advise placing one over the sink, one for every four feet of bench-top space (at a minimum but is not limited too), and also over the island, if not using pendant lights.
– Pendant lights over the kitchen island serves three purposes, they allow the practicality to be at a high level for task lighting, they make a perfect design statement, and also they compliment areas that need to be distinctive (your smaller spaces) without going over the top.
– Under-cabinet lighting, in the form of compact fluorescent lights, is another great option for task lighting in the food preparation areas.

When I asked our Kitchen Designer her input on how important lighting is, she gave us an awesome explanation: “Lighting completely changes the look & feel of a space. It is one of those design elements which often goes unnoticed when it is good but is glaringly obvious when done poorly! When choosing the correct lighting it is really important to consider the space is used – where in the kitchen will you be working the most? Will shadows be created if lighting is positioned behind you?

Strip lighting is a great option for under upper cupboards whilst LED down-lights are the best option for overhead lighting. Don’t forget about pendant lights & wall sconces which will add key lighting to high use areas- not to mention adding style & interest to the overall kitchen design.”

Common kitchen task lighting options include:

– Strip Lights: Versatile and great for illuminating a cabinets interior, especially low cabinets that hardly receive any ambient lighting. LED strip lights are also used under the cabinet to fully illuminate counter spaces.

– Puck Lights: Round and oval, puck lights are great mood lights and can be used to illuminate countertops in the form of a scallop, spot or pool of light.
If your kitchen is particularly well-designed the right placement of accent lights can be really complimentary and help really highlight your favorite elements.

Common kitchens accent lights will include:
– Dimmers: Having a dimmer switch allows you to progressively transition between the levels of lighting which would range depending on the different tasks in the kitchen. This option is energy efficient and very versatile.

– Motion Sensors: This option can come across as very intriguing and a great idea for the pantry and smaller areas, how many times have you turned on a pantry light and forgotten about it? This option is very versatile and stylish at that.

All-in-all, the kitchen is the magnet for socializing, cooking, and entertainment; all activities that thrive with a generous level of lighting to accommodate each activity. By following the guidelines of light layering, finding the right fixtures and controlling them properly, your kitchen is sure to always wow you and your guests.

Kitchen

Refresh that rental

Are you currently in a cosy rental but the idea of a new kitchen excites you? We all know with rentals we are quite limited with what we can and can’t do, this can be a bit of an itch we NEED to scratch – especially after going through all the possible ideas for design and what our dream kitchen would be when we win lotto. Good news is; I have the perfect guide to achieving the feel of a new kitchen without overstepping our limitations.


This first step is a bit of a questionable one until you read the reasoning as to why I have added this in, start sprucing up the room by adding a plain, medium sized mirror in the kitchen it does in fact achieve all sorts of visual positivity. It’s an unexpected element in the kitchen so it instantly makes a statement. If you have a window, it’ll help spread the light around. If you don’t have a window, it’ll be even more vital for reflecting what light you do have in the room.

Create a temporary splashback in the kitchen, a lot of times rental kitchens don’t have any sort of splashback as they are just done to be as basic as can be whilst focusing on that practicality but whose to say you can’t spice it up a bit? You may need to run this past your landlord, but you can achieve this by using a small cut of a detailed/patterned wallpaper in which you can buy from your local paint shops (& even hardware stores if they stock wallpaper!) super easy yet super fun way of adding a dash of your style, temporally.

Do you have old, raggedy flooring that you just want to take a jack hammer to get rid of the awful eye sight? Use a rug – you can get as creative as you like with all these different sorts of rugs out there and you can use any size to cover how ever much you like (bonus with this is you can take this rug with you if you decide to move or even change it up when desired with another rug! Winning)

Boring cabinets? Colour not quite up your alley or isn’t quite linking in with your other colour scheme going on in the rest of the house? Try getting some contact paper, temp wall paper or even vinyl to give your cabinetry a new beginning – just be sure that you can remove whichever product you use without damaging the underneath and, some may need consent from the landlord.

As we all know and have seen how amazing open shelving looks in the kitchen you may not quite have that in a rental, unfortunately there is no real way to have proper floating shelves without getting consent and spending some money to achieve that BUT I can help you fake this look in a more easier, affordable way and this involves taking the doors off your cabinetry where you desire to have open shelving. Of course, this will look a bit different to open shelving, but it is a pretty close idea in comparison and it keeps the area looking more open and modern (just be sure to store those doors safely away and easy to put back on if needed.)

Add a magnetic knife block or a utensil wall holder, these are easy to install and can be taken off when you no longer need that – this looks edgy and keeps storage under control.

Add some plants to jazz up the positive vibes in your kitchen,  plants can uplift your mind set and feel more relaxed – you can even add some herbs and spices so when your cooking up a storm you have this right at your fingertips! Super cute idea and an amazing way to spruce up your kitchen.

Don’t have a ton of space do your prep work? Consider DIYing or buying a chopping board that covers your kitchen sink or stove when you’re not using them to add extra space to work. this creates more space and you can store this easily – another advanced option is to DIY your own kitchen island with wheels! look ideas up on Pinterest as there are so many we couldn’t just choose one!


Hopefully you feel like your in the next best thing to your dream kitchen in your rental kitchen.

A brief history about the kitchen

Today i wanted to take everyone back to the very first kitchen and the history of how we have evolved into today’s design. Everyone knows or may have seen the bright, funky colors and basic, similar designs kitchens where a few decades ago (in my opinion, i love modern but i also love retro and original! so evolving into the styles and trends of today was and still is very exciting for me) and we’ve all seen and heard of the newer kitchen designs dated as of today, the future designs really interest me.

Get comfy, make a hot tea and be prepared to see the timeline.

  1. THE ORIGINS – Back in ancient times and I’m talking years and years ago, our ancestors cooked on open fires that were constructed outside on the flat ground, later on they had an idea to construct something that would hold pots and pans above the heat instead of holding them, themselves. they had come up with a simple, masonry design which was put in place to hold the handles of the pots and pans etc. In this era, the food was often placed in metal cauldrons that were hanging above the fire. These cooking areas naturally caused people to gather as they were the primary source of heat, light, safety and of course, food. The smoke and soot let off from the fires were a HUGE problem until the 16th century as it would go everywhere, this is when chimneys came into the mix With a chimney, smoke was drawn up and out of the great hall, making it easier to breath and easier to create large cooking fires in fireplaces. Here’s a picture to show you exactly how it was:
12th Century Kitchen

12th Century Kitchen


2. THE DEVELOPMENT OF STOVES – Moving along to the year of 1735, economic trends and politics had a massive influence on the practicality and design of the kitchen, technological advancements were constant many of which came in effect to minimize the time spent on a meal and the work involved around it, in the 18th century this is where we would find this design to come into effect (still fueled by wood at this stage.) One of the earliest wood-burning kitchen stoves was the Stew Stove (or Castrol Stove) developed in 1735 by the French designer Francois Cuvilliés. An early yet famous example of a metal stove is the Franklin stove (pictured below) which came into effect in the 18th century, invented by Benjamin Franklin (thats right, the guy you see on American $100 bills) in 1742. It had a special guide in place for hot gases to escape, allowing heat to enter the room instead of going up the chimney. However, this stove was designed only for heating, not for cooking – Strange huh?! The industrial revolution encouraged new inventions, cheaper prices, and new ways of efficiency. The most common stove for heating in the industrial world for almost a century and a half was the coal-burning one. Coal stoves came in all sizes and shapes and different operating principles. Since coal burns at a much higher temperature than wood, coal stoves needed to be constructed to withstand the high heat levels.


1735 - Oven

1735 – Oven


3. THE OBERLIN STOVE – Progressing a little up the timeline to 1834, a man named Philo Stewart took it upon himself to design a compact, wood burning cast iron stove in which was named the Oberlin Stove. this was a metal stove, small enough to use for cooking. It was much more efficient than cooking in a fireplace this is because it had increased cooking temperatures and had the option to record cooking times. It actually blew up and became a major success for Philo,  it could be cast into decorative shapes and forms and could easily withstand temperature swings from hot to cold. These iron stoves evolved into specialized cooking appliances with flue pipes connected to the chimney, oven holes, and installations for heating water.

1869 - Philo

1869 – Philo


4. THE MOVE TO GAS STOVES – Complaints and concerns about air pollution from the smoke excretions arose and sent a decline in coal stove purchases way down hill – Gas the became the next best thing. Because they were fueled by gas the production of the oven became lighter and even smaller! the genius British inventor James Sharp gave a big yes to the gas stove invention in 1826. By the 1920s, gas ovens were used in most domestic kitchens and was very rare to see the older ones.

1826 - James Sharp

1826 – James Sharp


5. THE GRAND APPEARANCE FROM THE ELECTRIC OVEN – This oven caused quite the competition between the Gas stove and itself, this occurred in the 1920’s and 1930’s. The Copeman Electric Stove Company (based in Michigan) received the first patent for an electric stove in 1912. Copeman Electric Stove, 1912 – Mostly wood, it had two ovens, top units, automatic timer and heat control.

Copeman Electric Stove, 1912

Copeman Electric Stove, 1912


6. MODERN KITCHEN DEVELOPMENT (Post world war #2 onwards…) – The housing and manufacturing development of post World War 2 made a huge effect on what we class as the “modern” kitchen nowadays. There was a major jump in demands for kitchen technology and equipment that inspired homeowners  to rip down the walls that once hid their efficient kitchens. The kitchen was becoming quieter, cleaner, better organized and easier to work in, a sense of pride, and slowly a place to entertain family and friends. In the 1960’s and 1970’s other social changes were taking place that upgraded the style and trend of the kitchen, a renewed interest in home baking/cooking, having a dedicated space for utensils and even entertaining was suitable for having the kitchen be the heart of the home. The kitchen became a place for improving baking skills, displaying fancy (expensive) cookware and becoming the heart for social gatherings. By the 1980’s, the idea of a completely open kitchen with appliances in the open, came into the new idea of design.

1960's - Kitchen

1960’s – Kitchen


7. CONTEMPORARY KITCHENS – Today’s ovens have evolved into more time, health and energy efficient, our appliances are finally catching up with our fast moving lifestyles, speed ovens for instance, cuts the cooking time in half which actually saves energy used during meal preparation The kitchen doesn’t look like the kitchen, in the traditional sense. It’s now a clean space, with a full range of sleek appliances looking towards a sustainable future. Only up from here and we’re excited to see what the future brings.

2018 - Kitchen (Next Edition Kitchens)

2018 – Kitchen (Next Edition Kitchens)

Flooring

Install Kitchen Cabinetry Or Flooring First?

A repetitive, yet relevant question you may be asking yourself could be delaying your first step to renovations and that tricky questions is: “Do I reface my cabinetry first or does the flooring need to be done first?” Google has all sorts of answers which can often lead back to square one of being confused again – although there is no wrong way to do this there is safer, more practical ways of sorting the schedule.

When you replace your cabinetry, your existing flooring does run the basic and obvious risk of damage, although our busy working bee’s take all precautions there can be some un-intentional markings/damage made.

Here’s where you may be getting confused; when you are having a whole new kitchen put in, flooring is best to go in BEFOREHAND as the layout of the new kitchen will most likely be different therefor flooring is required to go in first to guide the layout BUT when you are just refacing the existing units the flooring is suggested to wait until after the refacing is done as the layout is set up already so the workers can update the fronts and the flooring is being updated in the existing layout it already is generally.

One of the benefits to having the kitchen renovated first is that you can be more confident in your flooring selection, matching your cabinet finish to smaller flooring samples and hypothetical finishes is about as helpful as painting a home’s interiors via the colours shows on small paint swatches—a process many of us have pulled our hair out over, by waiting to install your flooring after the kitchen is done, you’ll have some time to contemplate which colours or finishes will look best with your brand-new kitchen.

The only exception – install floating hardwood floors AFTER the cabinets, if you are planning on having a hardwood floating floor (or any floating floor such as cork or laminate) you should consider installing the flooring after, why? Because floating floors are clicked together and not glued down to the floor, the reason for this is that the floating floors tend to move, and they expand and contract. If part of the floor is trapped under the cabinetry (which is quite heavy) it cannot properly move resulting in all sorts of issues including bulging, buckling or even breaking. Having this in BEFORE the cabinetry ensures the cleanest look with the cabinets – you don’t need to worry about cutting some to size to fit around the cabinetry and instead can have a nice, flush floor with no issues.


There we have it! hoping this helped a few head scratches and has helped you move onto the next step.

Oven

How to clean your oven naturally

Today I am inspired to write this blog as my oven is in dire need of some TLC – I did some research on how important this is and the results where mind blowing, I had no idea how regularly you theoretically should be “maintaining” your oven. It seems to be one of those things that “you’ll get around to that tomorrow” and tomorrow turns into the next day, and the day after that and so on but let me remind you how important this is!

My first question I had when I opened my oven last night was “when did I even last clean this?” my answer was struggling to come to mind, it must have been a good 4 months ago (not so bad, right?!) well – WRONG! Here my next question came, how often are you supposed to clean your oven?

Once. Every. Month. HOW BIZARRE! Of all the years I have been in charge of that sort of thing, I never even realized there was actually a time period on how often you should be doing it.

Why is there a time on this? I get the hygiene side of it but what’s the actual history behind this? Simple, your oven can become less efficient at reaching temperatures and eventually may just stop working all together if burnt food/build-up is left unattended.

Crusty build up can also impact the taste of your food and, while high temperatures can kill some bacteria, it’s not a good place to be cooking food (like I said, hygiene)

So, now that I’ve got you itching to go have a look at your ovens – I also have a natural guide on how to clean your oven without even turning it on, this method is super easy and really cost efficient.


What you will need:

  • Baking Soda (1/2 cup)
  • Water (to make a paste)
  • Rubber Gloves (Preferably durable, non-disposable ones)
  • Damp dishcloth
  • Spray Bottle
  • Vinegar (White)


Instructions:

  1. Clear out the oven

Take out all dish-racks (clean those as well) make sure everything is removed so you have access to get deep in the back of the oven to clear that build-up.

  1. Mix the paste

In a small bowl, mix a 1/2 cup of baking soda with a few tablespoons of water. Adjust the ratio of both as needed until you have a spreadable paste.

  1. Coat the oven

Spread the paste all over the interior surfaces of your oven, steering clear of the heating elements. Use gloves for this portion, as the oven may be pretty gunky. The baking soda will turn a brownish colour as you rub it in; it also might be chunkier in some places than others, which is fine. Just try to coat the whole oven to the best of your abilities, paying extra attention to any particularly greasy areas.

  1. Let it sit overnight

Allow the baking soda mixture to rest for at least 12 hours, or overnight.

  1. Wipe the oven out

After 12 hours or overnight, take a damp dish cloth and wipe out as much of the dried baking soda paste as you can. Use a plastic spatula to help scrape off the paste as needed.

  1. Spray a little bit of vinegar

Put a little vinegar in a spray bottle and spritz everywhere you still see baking soda residue in your oven. The vinegar will react with the baking soda and gently foam.

  1. Do a final wipe down

Take your damp cloth and wipe out the remaining foamy vinegar-baking soda mixture. Repeat until all the baking soda residue is gone. Add more water or vinegar as needed while wiping to really get the oven clean and shiny.

  1. Replace your clean oven racks

Replace the oven racks and anything else you keep in your oven, and you’re done!


Go give that oven some TLC – You’ll thank yourself later.