Spring

Make Your Kitchen Spring Ready!

What pops to mind when you hear or see the word spring? For me it’s a feeling of freshness, a window of new beginnings and a great chance for ideas to bloom. This is a great chance to spice up your kitchen and give it that “Spring” feeling, don’t run away in fear this will cost an arm and a leg because it certainly doesn’t have to burn a hole in your pocket.


Get that feeling of freshness:

Starting small at a very low cost (or if any cost at all) Firstly, gather some flowers and a pretty vase that draws you in – this will give that feeling of a crisp, fresh feel. No need for a large, over-the-top floral arrangement… just a few stems will do the trick! Change it up with colours to compliment the season, here’s a few:

  • Lavender/Purple
  • Rapture Rose (Intense pink)
  • Sky Blue
  • Peach
  • Yellow

Just to name a few, feel free to incorporate any coloured flowers you like!

A window for new beginnings:

When was the last time you fully renovated your cooking utensils range? Swap out the cutting board that has seen better days and the plain plastic cooking utensils and replace them with ones that have a little more energy, Spring is also a great excuse to biff all your tea towels that have seen better days and replace them with new, fresh ones.

New ideas to bloom? I think yes!

Forget about making a huge investment – a small painting or framed quote is an affordable way to own a piece of original art. Get creative and visit your local opshop or even get one of the kids to paint you a picture!  You can frame it and then rest it on your benchtop, or even hang it up on an empty piece of your kitchen wall.

Bring the texture in

Wood and natural wovens are such a golden addition to any space, they add a bit of texture to the area and interest as well as warmth. Find a large bowl and fill it with fruit and your kitchen will be screaming its spring ready.

This is a few ways to get your kitchen in the spring season and will be easy to change when the next season is on the way! Some of these ideas can be incorporated with other seasons anyway

Color scheme

Most Included Trends In 2018 Designs

Most included trends in 2018 designs.

If you have just recently renovated or are looking into doing so, you’ll probably already know about these common trends everyone’s diving for in 2018 and we don’t blame these choices – read on to see what everyone’s hyping over!

Banquette Seating:

Believe it or not, this is an older trend which has rocketed into today’s trends and we aren’t complaining! This simple, yet practical idea has an edgy yet comfortable look and has more room for family/friends for that Sunday night roast or even a nice hot cuppa’ tea on that rainy day with your favorite book. With its space-saving design of bench seating made more sense than including a full set of table and chairs in the space of the kitchen.

Furniture historians trace the banquette, derived from the Germanic word for bench, back to 15th century France. Having seating is the kitchen was to have a concealed entry to secret passages that may have been located underneath banquettes in palaces and castles and was typically made from wood whereas nowadays they are made with cushioning and material to match your style.

Flat front Cabinetry:

We all want the simple yet elegant look but also still want to be able to open and close our cabinets and drawers, so this is where our push touch system comes into the trends of 2018 – no more catching your clothes on the edge of your handles, no more bumps and bruises on the children’s foreheads from running into the edge. Unfortunately, this design has no history behind it but take it from us that if you’re wanting a clean, seamless edge then for sure go for this!

Tile splashbacks:

While the kitchen splashback is a common aspect in many houses now, it wasn’t always this way. In fact, the modern idea of a kitchen splashback is a relatively recent invention, but where did this fantastic, practical idea originate from?

Like many common household features, the splashback can’t be traced to one single source. What we can confirm about the original splashbacks is that they came into use shortly after running water became widespread around the 1930s due to the advent of running water, kitchen innovations emerged swiftly, and the backsplash became a common kitchen sight.

Originally, backsplashes were about 4 inches high and were made of fragile materials like glass or tiles. Many were simply attached to the then-popular butler sink. When under-mount sinks rose to popularity in the 40s, splashbacks were no longer directly attached to the sink, so the only solution was mounting the backsplash directly to the wall. Over the following decade, the splashback became a popular place to demonstrate decor tastes. Around this time, the bright colors and creative patterns of the cement tile backsplash became the stylistic standard.

Even though the cement tile splashback rose to fame in the 1950s, it’s held up to the many home decor style changes over the years with ease whether it adds liveliness to a simple kitchen or accompanies a lively, colorful kitchen, the cement tile backsplash shines in just about every setting. In addition to its persistence’s, cement tile has proven to be one of the best materials for a splashback, why? Because of Its natural durability and easy clean-up is perfect for facing the splatters, stains of cooking. Over the years, production quality has only increased, so modern cement tile is likely to last even longer and hold to even more sauce stains, oil spatters, and splashes of water than its prototypes.

Mixed Metals:

This is such an elegant touch to incorporate into your designs to give the kitchen an edgy yet modern touch, there are different sorts of colors and finishes to choose from to suit your style like Matte black/white, polished chrome, brushed nickel just to name a few. There isn’t much history behind this one as it’s more so a design compliment for the finishing touches.

Multi-purpose islands:

2018 has just gone a step higher with trends and practicality has seemed to really boost up there alongside all the trends – this is a great example.

Shortly after World War II, popular home design shifted from closed floor plans to open concept spaces (sound familiar?) designed to make the work within the home more efficient and less labor-intensive. An expansive, wide-open kitchen meant that dinner could be prepared while children in the family room were in clear view. Once dinner was ready, everyone could eat in the kitchen itself rather than the dining room, making it easier for the cook to serve and manage the meal but with all the benefits an open concept floor plan presented, it came with challenges, namely a shortage of storage and counter space. Therefore, the kitchen island was born.

The kitchen island became a solution to space challenges, providing more surface area, storage potential, and a place for everyone to come together while others were cooking (plus, as we well know now, it also serves the purpose of separating the kitchen from living areas in absence of walls).

It is very popular to add in a cook top or a sink into your island now, but the options of design are endless! Come and talk to us down at Next Edition Kitchens to see what we can do for you!


Style trends come and go, so don’t invest in the latest look unless you love it. That said, highly-personalized or outdated style choices can limit the appeal of your property for resale.

For major renovation projects, it’s always a good idea to stick to the more neutral colors and classic styles. It will give your remodel durability and appeal to the greatest number of buyers when it comes time to sell. It will also give you flexibility to update your look in a few years without a total overhaul. Use non-permanent fixtures – like paint, furniture and accent pieces – to personalize the space and incorporate trendier choices.


Butler sink

The Butler sink – Must have sink 2018

A couple of weeks ago, one of our suppliers had come to us and proposed an updated brochure of beloved sinks and mixers we use with a few new additions thrown in here and there and let me tell you – we are in for a jolly good treat!

One sink that particularly stuck out to us was the butler sink (or otherwise known as the farmhouse sink) I decided to do a bit of research on this gem and prepare to be amazed – there is a bit of history behind the idea designers had whilst designing this little beauty.

Let’s start with the history so we can appreciate it even more knowing is origination.

You will notice this sink has many different names it goes by depending on what part of the world you live in, here in NZ and Australia we most commonly identify these as a Butler sink or Farmhouse sink, but they are also called apron front (mostly in the US), London and Belfast. (I’m going to stick with using Butler sink for this blog) London and Belfast are in fact two specific designs of farmhouse sink – read a little more about this below.

The Butler sink originated in a time when there was no running water, so in this time we all used buckets (or pales if you will) of water, the idea behind the sink was that it was a place to hold large amounts of water – water that had to be collected by hand with buckets and barrels from nearby water wells, lakes or rivers.

The two original iconic Butler style sinks, which emerged in Ireland and Britain in the late 17th century, were the London and the Belfast sink. They were both of similar design, however – each had their own noticeable different characteristics designed to suit the area they would be used for. The Belfast sink was deep and had an overflow so that excess water could be easily drained away instead of flowing over the sides of the sink. Unlike Belfast, the London sink was designed to be shallower and had no overflow so that every drop could be kept inside the sink.

The design of the sink means that the user can stand directly at the front of the basin – with no cabinets or benchtop in between. This made the Butler sink more comfortable to use for women who would, in olden days, spend some of their day at the sink, preparing food, washing dishes, washing clothes and even washing babies.

Practicality of the size:

While you could still wash your baby in today’s Butler sink, you’ll probably find it more useful for washing large pots, baking/oven trays etc. – items that you would generally struggle to wash in a typical sink, and – if one large bowl isn’t enough, you can find several double bowl options, too.

Installation:

Originally, Butler sinks were designed to sit slightly to the front of the cabinets so that any water that spilled over down the front of the sink it would run directly to the floor instead of flowing on and damaging the cabinets, this is still how Butler sinks are typically installed in a kitchen.

They are also installed just under the benchtop level so that the bench can slightly overhang the sides of the sink, making it easy to wipe water from the bench straight into the sink.

Whats the material?

White Butler sinks are most commonly made from either fireclay or porcelain.

Fireclay sinks are made of clay, which is heated to an extremely high temperature that makes the sink very hard and durable. It also gives the sink its beautiful high shine. The durability of fireclay means that it is very resistant to scratches and chips and is also very easy to clean.

Porcelain sinks are a ceramic material, again heated to high temperatures, although not quite as high as fireclay. They look like fireclay sinks but are less expensive. Porcelain sinks are not quite as durable as fireclay and are more prone to chipping and discoloration.

There are many other options regarding copper colors & stainless steel which both have many benefits.

There is a modern version which unlike the butler sink, it sits on top of the benchtop and has a space for a tap hole incorporated into the sink, eliminating the need to have a benchtop run around the back of the sink. The fact that this sink sits on top of the bench eliminates the risk of water finding its way down the sides of the sink, making for a more water tight option – although not as authentic as the original design.

If you’re needing inspo, don’t fret! i have you covered….https://www.pinterest.nz


Clean bench-top

How to clean your Stone bench-tops (Uniquartz, Silestone, CeasarStone, Granite)

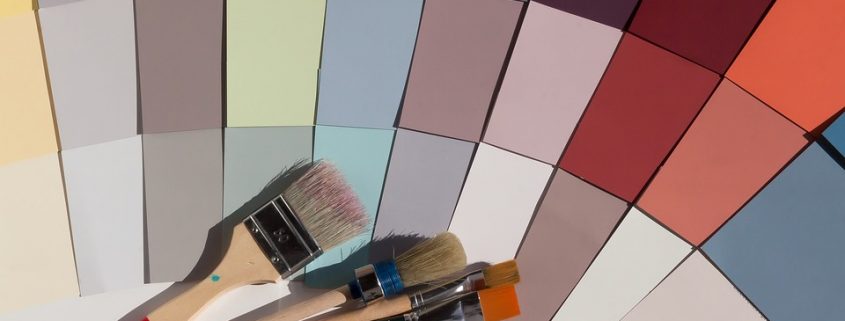
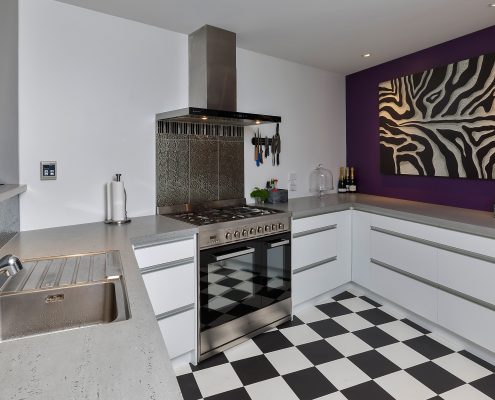
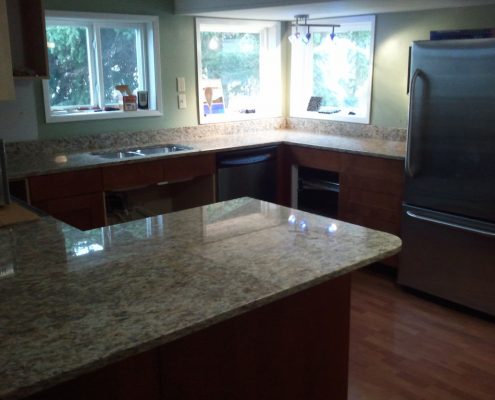
We all want to keep our beautiful bench-tops in great condition but what is the best way to clean these and keep them looking brand new? Don’t be sucked in to buying hundreds of cleaning detergents – most of these have nasty chemicals in them that can cause more harm than good. We have easy, affordable ways for each different type of stone to suit your needs.


Caring For Your Uniquartz Benchtop

Uniquartz surfaces are virtually maintenance-free.  There is no need for polishing, sealing or reconditioning.  Light dusting followed by cleaning with warm soapy water is enough to restore the shine to the bench-tops.  However, make sure not to use any abrasives or harsh chemicals on the bench-tops.


Caring for your CaesarStone Benchtop

To clean CaesarStone, we recommend using warm water and a mild detergent or quality spray and wipe type cleaner.  Virtually maintenance free, CaesarStone’s hard, non-porous surfaces require no sealing to renew the luster and are simple to clean.  In most cases, soap and water or a mild detergent is enough to keep your CaesarStone countertop looking like new.  If necessary, use a non-abrasive soft soap along with a Norwex microfiber cloth.  Afterwards, thoroughly rinse with clean water to remove residue.


For stubborn stains or dried spills, apply a non-abrasive household cleaner and rinse to remove residue.  To remove adhered material such as food, gum, nail polish or even dried paint, first scrape away excess material with a plastic putty knife and then use a damp cloth to remove any marks or residual dirt.

Like all stone material, Caesarstone can be damaged by sudden and rapid temperature changes.  Therefore, we suggest that hot pots and pans never be directly placed on the surface.  We also recommend a rubber pot mat which you can purchase from Kmart or a trivet which can also be purchased from Kmart, be placed on the surface under cooking units such as electric frying pans, crock pots, or roaster ovens.

Caesarstone is highly scratch resistant, however avoid abuse of the surface by refraining from using sharp objects such as sharp knives or screw drivers directly onto the surface.

It’s important to be aware that like any other surface, Caesarstone can be permanently damaged if exposed to strong chemicals and solvents that can damage its physical properties.  Never clean your CaesarStone surface with products that contain Trichloroethane or Methylene chloride, such as paint removers or strippers.  Avoid the use of highly aggressive cleaning agents such as oven/grill cleaners and dishwasher polishing agents that have high alkaline/pH levels (pH 8.5 or higher).  Products containing oils or powders may leave a residue and should be rinsed off thoroughly.  Should your surface accidentally be exposed to any of these damaging products, rinse immediately with clean water to neutralize the effect.


Caring for your Silestone Benchtop

it is recommended that you wipe up food and liquid spills as soon as possible.  For everyday routine cleaning, you can use warm soapy water (containing a mild detergent) and a damp cloth.

Before the use of any cleaning product outside of the above option, please check that the product does not contain trichloroethane, methylene chloride or high levels of alkaline/pH.  Should the surface be accidentally exposed to any of these damaging products, rinse immediately with water to neutralize the effect.

We do not recommend placing hot pots, pans, and oven trays directly from the hotplate or out of an oven onto the surface.  We always recommend the use of a rubber pot mat or trivet to place hot items onto.  Prolonged direct contact with, or radiated heat, from very hot pots can cause thermal shock, discoloration or damage.

Engineered Stone, like all stone, is like glass.  And like a glass table top, if you hit the edge with something hard with enough force, you can damage the edge.  So, take care around the sink when washing cast iron pans etc.  Also take care loading and unloading the dishwasher.  If an accident occurs, it can be repaired by a trained technician.  The repair will be just that, not a complete fix meaning that you may notice the repair.


Caring For Your Granite Benchtops

The most important facet of understanding your granite bench-tops is that it’s a porous material.  Any natural stone has the characteristics and must be understood to ensure the beauty of the stone.  Porous simply means it can be penetrated by water, oils, grease, and chemicals.  Your bench-top will be coated with a non-toxic sealer upon installation, to resist all types of stains.  You ideally should be getting it resealed every 12-18 months in which your general hardware shop should have a spray on one that you can easily do yourself.

It is important to clean all spills and keep unwrapped foods from being on the tops for extended periods of time as the oils and minerals can eventually work thought the sealer and can stain your top.  Under normal conditions this is never a problem.  An example of a potential problem would be to leave for a holiday with a grease spot on the granite surface.

The best aspect of granite is the resistance it has too heat.  You have the freedom to take hot dishes directly out of the oven and place it on the granite without fear of damaging your bench-tops.

Regular Maintenance & Cleaning

If your granite darkens when it is wet, do not be alarmed.  It will return to its original colour when the water evaporates.  The safest way to clean your granite tops is to use products designed specifically for stone.  Cleaners and disinfectants of this type are neutral on the acid scale, so they pose no risk of hurting the polish.  Dish-washing liquid and water will work to clean your tops, as will spray on cleaners such as window cleaners.  Avoid anything that contains bleach or any wipe or cleaners that have grit in them.  If you want to avoid water streaking while cleaning, you must wipe your tops until they are completely dry.  If lime build up occurs around your faucet do not use lime removal products.  Gently scraping the lime off with a straight razor is the best solution.

Avoiding Scratches

Granite is a quartz based and can therefore be scratched by quartz or anything harder.  Knives will not scratch granite, although cutting on your bench-tops is not recommended as your knives will dull very quickly.  Diamonds will scratch granite – removal of diamond rings before cooking is recommended.  Certain stoneware dishes contain rough silica sand and pose a risk of scratching.  Some pizza-stones will scratch granite if they are spun around while cutting the pizza.

Avoiding Chips

Chips in granite are not a common occurrence.  When they do happen, chips are most often caused by banging something into the edge of the bench-top.  Heavy pots and pans and the bottoms of large bottles do most of the damage.  Take care when you handle them around your granite.  If a chip does occur and you find the piece that chipped out, save it.  Most of the time it can be epoxied back into place.


Do’s and Don’ts for Granite:

  • Do clean surfaces with mild detergent, stone soap or specialty cleaner, with a soft clean cloth.
  • Do rinse surfaces thoroughly after cleaning them dry, with a soft clean cloth.
  • Do blot up spills with a paper towel immediately.
  • Don’t use vinegar, lemon or other cleaners such as bathroom, grout or tile, and tub cleaners.
  • Don’t use cleaners containing abrasives.

https://www.kmart.co.nz/product/grid-trivet—matte-black/1124400 – Trivets


Sold

How to ace selling your home

When it comes to selling your home, a hundred aspects run through your mind like “what do potential buyers actually look at, what is the focal point in my home etc” the kitchen gets the most attention and comments from potential buyers. It’s often the room that is easiest to fall in love…and the one that is easiest to hate. I have a few pointers on how to make these clients fall in love with your sale.


Embrace Grey and White,

To create a kitchen that sells, ditch the complicated and risky colour trends that out-date in few months to come, go for the simplicity and elegance associated with Greys and Whites, Simplicity is an increasingly popular design trend when it comes to kitchens, and should be reflected in the colours you would ideally use when preparing your home for selling.

Why white? Well, simple – white is associated with the clean, bright and crisp illusion. This is also a very versatile colour your potential buyer would be able to alter their personal style with, white gives many opportunities to decorate the kitchen with a pop of colour on appliances or cutlery and storage containers etc.

Okay, so why Grey then? So Grey on the other hand can be portrayed as a very calming and charming colour, it is a very common colour to use if you want to create a warm welcoming environment and comfortable feeling (making those buyers feel at home already!)


Focus on utility,

Buyers don’t just want a kitchen that’s pleasing to the eye – they want a kitchen that functions properly as well. When you’re selling your home, you need to find a good balance between aesthetic design and actual function. Thankfully, there are a lot of creative techniques that you can work into different parts of a kitchen that promote function without degrading the overall personality of a kitchen.

Examples of techniques that promote functional kitchen design include:

  • Built-in storage racks in pantries.
  • Deep drawers to hold more pots/pans/plates/bowels etc, so these are all tidily tucked away.
  • Mini centre islands on wheels that can be moved around various areas of the kitchen based on need (next to the sink, next to guests, off to the side and out of the way).
  • Pull-out bins disguised as a drawer (saves more room than having a free-standing rubbish bin in the way!)


“A great-looking kitchen will draw attention. A great-looking kitchen that also has great function will be unforgettable.”


Create more space,

We all dream of a big kitchen to make our time using it a breeze – highlight the space you have as best you can, there are many techniques best suited to your spacing (read our blog kitchen layouts to identify yours now!) small kitchen space? you can still create the illusion of space and open the room by exposing shelves and cupboards, rather than keeping storage items, plates, and bowls hidden behind suffocating doors, consider replacing your traditional cupboards with open-concept ones. At first thought, you might think that this small change would make a kitchen look messy or cluttered—but it can lend to the warmth and character of a kitchen.


Make a focal point,

I know these tips are guiding you to be simple but having a good focal point can be very mesmerizing like a patterned bench-top or unique lighting to enhance aspects of the kitchen. You can even just spice it up with having funky coloured appliances like your jug or oven! The options are endless, but this gives the view that this kitchen is versatile and again, can be adapted to any taste/style.


Use quality appliances,

Everyone wants to feel like their living in luxury and who wouldn’t want to feel like a top chef?  A lot of buyers are viewing what appliances are in the current design as these appliances are always being updated to the latest gadgets – having a high-quality oven can make this a baker’s paradise, they’ll leave wishing and waiting to bake up a storm using this kitchen! it also adds value to your home and will be one less thing for potential buyers to renovate or upgrade.

Casserole/stew

Winter’s Beef Casserole

Don’t just warm your tummy – warm your soul as well! this recipe is a MUST for these winter chills.

  • 600g chuck or gravy beef.
  • 1x onion, sliced.
  • 2x medium carrots, sliced thinly.
  • 2x Tbsp plain flour.
  • 3x cups beef/vegetable stock.
  • 1x tsp Worcestershire sauce.
  • 1x Tbsp soy sauce.
  • 1 Tbsp thyme.
  • 2x bay leaves.
  • 2x tsp garlic.

Preheat the oven to 180°C.

Cut beef into cubes/strips.

Season with salt and pepper, add about 2 tablespoons of oil and mix well.

Heat a large fry pan over a medium-high heat. Brown the beef in batches then place in a casserole dish.

Reduce heat in pan, and sauté the onion and carrot in butter. Cook for 1-2 minutes, stirring occasionally.

Sprinkle in flour and stir until the vegetables are coated.

Gradually pour in stock, stirring well. Add the remaining ingredients and bring to the boil. Pour into a casserole dish, cover then place in oven and cook until the beef is tender. Stir every 40 minutes or so, adding water if needed to keep the ingredients just covered. (Roughly cooking time is 2hrs and 30mins but will depend on different types of ovens and temperatures)

Smart tip: This casserole can be cooked on a stove top or slow cooker.

Stove top method: Place the browned beef and other ingredients in a heavy-based pot. Partially cover, keep the heat low. Simmer until the meat is very tender. Stir occasionally, adding water if needed to keep ingredients just covered.

Slow cooker: Place the browned beef with other ingredients into the slow cooker and place onto low for 6 hours or until the meat is tender. Depending on size and cut this can take up to 8 hours.


Toe Kicks

Why toe kicks are a MUST in the kitchen.

This blog is about an aspect in your kitchen you probably didn’t even know existed – the all mighty toe kicks. The toe kick for those who don’t know is a small panel located under your cabinets where the doors usually end, the toe kick covers the space from then to the flooring. It turns out that paying a little attention to this hidden away spot can make a huge difference in the look and feel of your kitchen.

There’s a reason the toe kick exists to begin with, the next time you’re standing in front of your kitchen sink or working at the benchtop, take a look down at your toes, chances are you won’t be able to see your toes because they’re actually positioned underneath the front edge of your cabinets, in the toe kick.

When you stand at your kitchen sink or cook at the bench, chances are your feet are positioned so that your toes are in the toe kick, without this little foot cubby hole you’d either bang your toes into the front of your cabinets, or have to learn over awkwardly to reach things at the back of your benchtop. It’s a helpful little ergonomic detail that’s so common that most people don’t think about it at all. (Bathroom cabinets that go all the way to the floor also have these.)

The toe kick can actually be more than just a practical thing in the kitchen – in most kitchens the toe kick is either painted black or the same color as the cabinets, to make it as invisible as possible. Although, some people like to make a statement out of these toe kicks, there is many different colors you can make these (you can even get a mirrored one! how snazzy is that?) reason being is it can actually be a good, simple way to tie in the color scheme of your cabinetry with the benchtop right up to the handles.

So there you have it, a toe kick is pretty much a tiny compartment for your feet to sit so you have a lot more comfort while working in the kitchen.


Mangatapere Beauty – New Kitchen In Whangarei

Check out this beautiful new kitchen in Mangatapere created for Trevor and Cheryl Barfoote by Next Edition Kitchens LTD, Get in touch today with the team on (09)4303074 to get your new kitchen!

6 Popular kitchen layouts (with pictures)

Ever noticed how creative you can get with your layout of a kitchen? the most asked question is “What layout would suit me and my house?” well, no more wondering – we have the perfect guide (with pictures) that will make being in the kitchen a breeze with the layout suited to your space.

First we have the U-shaped kitchen – this is perfect if you have a couple of cooks in the house who enjoy cooking together, this layout is designed to create and hold a wide range or space and storage making it easier to have more than just one in the kitchen. This layout best suits the larger rooms the kitchen is located as this layout is quite spaced out. The U-shape is perfect as it offers counters and work spaces on 3 walls and there is still the option of adding an island in the middle. Essentially, the U-shaped kitchen can offer the best of both worlds. The middle of the kitchen is yours to play with –  you can even include an island in the middle, this is ideal for the home owner that likes to not only spent lots of time in the kitchen making meals and baking but also sees it as a communal family room where everyone can get together.


Secondly, we have the L-shaped kitchen – this is perfect for those smaller units/flats that don’t have as much space but you still want to have as much space and storage as you possibly can, this is mainly ideal for one person cooking per time in a comfortable space. The only difference between this and the U-shaped kitchen is your pretty much losing one bench top and a few cupboards and drawers but being a smaller house with less residents this is perfectly workable. This dead end approach is great for those wanting to cook in privacy but if you don’t want the family shut out and like the idea of kids wandering through to check on dinner, the next option could be for you.

The third is the wonderful Gallery kitchen – This is a GREAT space saver and to be fair, some will argue this has slightly gone off the fashion board in the recent years with people more budging for those U & L shaped kitchen layouts because of the strict shape and closed-in feel doesn’t compliment a open plan living plan. But let me tell you the benefits, firstly, they can provide a two-walled approach to storage and facilities in a small space. Everything that a home cook needs is available on both sides but it is still a great way to save space in kitchen with minimal room to move. Secondly, the long walkway between the two work areas can open up the space on either side, allowing for a constant stream of traffic between the back yard and the dining area and a communal feel.

Number 4 Island kitchen – This design divides large kitchens into efficient, smaller working areas. The Island kitchens are by far the most popular layout because not only do they provide a host of new design options for new builds and renovations but they can actually enhance the layouts mentioned above. An island has many benefits depending on your design taste and style, it can give excellent depth and an opportunity to change this into a L-shaped kitchen but also a new meaning to a gallery kitchen as long as there is enough space to play with. Galleys are typically narrow but in a larger room, an island gives a stopping point in the middle for families to sit at. In other kitchens, like the large U-shaped kitchens, islands can be a great focal point in the middle of a large, dominating kitchen. Some kitchens that are short on space can use them for preparation while others will gain an alternative dining area.

Dark panels in kitchen - Grey

Peninsula kitchen coming in at number 5 – This is pretty much just a U-shape kitchen but without the wall behind, this design is perfect if you are wanting to achieve an island in your layout but just don’t have the space to put it in the middle This is ideal for homes that really want an island to work on or eat but don’t really have the space to build one out in the middle of the room. There are limitations to this approach in terms of its use and accessibility, but it can be a great compromise for enhancing a small, L-shaped layout.


The comfortable kitchen for one at number 6 we have our last but not least One wall kitchen – again, these are great for those smaller living areas, this layout would work fantastic in a holiday home or even a small flat, the layout has just enough space for everything one person needs – it looks tidy and can be kept that way quite easily – it is great for those on a budget as well as you aren’t really adding much to this design as it’s a nice, simple layout.


Choices

Kitchen Professional or General Contractor?

This time of year is the time everyone decides the kitchen needs some TLC or a whole new look, finding the best, creative kitchen wizard can become a nightmare if you leave this too long, bookings come in and out the door like crazy and delays occur with the kitchen installation dates and even manufacturing of the project BUT the reason home owners decide to suck it up and work around the talented lass/lad is because of the exceptional knowledge and organizing they take care of instead of you stressing out wondering if you have sorted everything and prepared all the subcontractors etc. also, you generally just end up dealing with the wizard himself opposed to making countless contact to different places here and there to sort everything.

Quality VS. Value:

Sure, we all tend to naturally go for what’s cheaper but if your looking for a quality job that will stand the test of time (and a definite guarantee on this one!) then a professional kitchen designer, manufacturer and installer is 100% the way to go. In many purchasing situations – a great deal is the desired outcome, the same goes for a standard renovation. A ‘too good to be true’ price could result in low-grade products and a hasty installation. A professional kitchen designer can offer you peace of mind that your investment is backed by their guarantee, and even more value in the form of reliability, expert advice and customer service another bonus is a lot of kitchen professionals can offer more customization around your ideas and style.

Reliability:

Most homeowners are more open to spending a little extra if it buys them peace of mind. A general contractor generally can’t offer the same level of reliability as a professional can – and in saying this, it’s not a deliberate situation they are constantly in but more so because they have many other projects that may come to be a priority, or some may be more urgent to complete than others. Some (not all) general contractors may have proof of the proper business licenses and insurances, but that’s usually where the credentials stop. A kitchen professional will have more resources to prove that his/her work is certified and reliable. Read reviews on the business pages, ask around locally to see who people recommend and make sure you won’t get into a catastrophe.

Level of expertise:

From your appointment to your installation, a kitchen specialist can offer you an elevated level of expert advice. For instance, Next Edition Kitchens LTD has a team of kitchen designers that are dedicated to finding the most current trends and helping you design your dream kitchen. Because most of its products are made and manufactured in its on-site facility, every member of Next Edition Kitchens LTD family is equipped to answer any question you may have, as well as offer expert advice regarding your personal wants and needs.

Customer Service:

Now this is probably one of the most important aspects — specialized professionals have the ability to tend to your needs from before your consultation appointment is scheduled, to, well – after your project is completed. Where a general contractor may be over-worked and too busy to work with your busy schedule, a professional kitchen company has employees ready to help. Oftentimes, a professional can schedule your appointment and installation when it’s most convenient for you. If you have questions or concerns, a professional company will always be there to answer your phone calls. Should you have to reach them for any reason after your installation, the same holds true. Whereas, it can be nearly impossible with a contractor. But you can rest assured that a professional will be around—and flexible—after your job is completed.

There are plenty of instances where a general contractor is a viable option, but for kitchen re-modelling specifically, a specialist is the way to go. The kitchen can be an especially demanding room to renovate, and a true professional has the level of expertise and reliability that is in line with those demands. No wonder more homeowners are choosing kitchen specialists for their kitchen re-modelling projects!