Posts

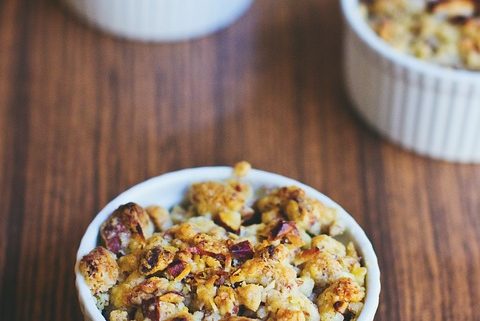
Delicious, Tummy-warming Apple Crumble

Delicious, Tummy-warming Apple Crumble

After a quick, cheap evening treat for after dinner? i bet you probably have all the ingredients in your household as the recipe is SO SIMPLE and just absolutely a family favorite to warm your bellies in this cold winter chill.

  • ½ cup plain flour
  • ¼ cup rolled oats
  • ¼ cup desiccated coconut
  • ¼ cup Soft Brown Sugar
  • ½ tsp cinnamon
  • 75g butter
  • 5-6 Apples
  • 2 Tbsp Golden Syrup
  • 2 Tbsp Raw Sugar

Preheat oven to 180°C on fan-bake.

In a large mixing bowl, mix together the flour, oats, coconut, brown sugar & cinnamon all together and the rub the butter into the mixture with your hands until it becomes crumbly.

Peel and cut the apples into thin slices (not too thin!) and place them in the oven proof dish – drizzle some golden syrup over the apples.

Spread the crumble mix evenly on top of the apples to completely cover the oven dish and sprinkle your raw sugar over the top to give it the caramelised taste.

Cook for 30-40 minutes or until the apples are cooked. Serve with vanilla bean ice cream, freshly whipped cream or warm custard for a delicious winters desert!

TIP* Add in some additional fruit with the apple, plums, peaches, pears or mixed berries would complement this just superbly!  

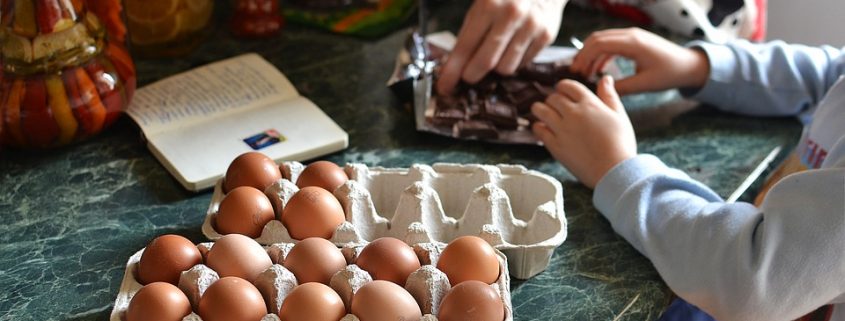
Children cooking in the kitchen

Keep the Kitchen child safe

When it comes to getting a new kitchen, we often forget about the wider aspects to the design process.

Children can play a major part in the design process – particularly the younger ones. They are very compelled by the kitchen and are heavily enticed from all the colourful things you put in and take out of cupboards, drawers & the fridge.

Kids love to be wherever you are – INSTANTLY if they see you’re about to do something they want to help with and we all know they love baking/cooking (i’m pretty convinced it’s because they get to have multiple taste tests and get the rights to licking the bowl!) this is why it becomes important as they are spending a chunk of time in the kitchen also and it can be a jungle for them in there with so many things to grab and play with.

While you spend quite a bit of time in the kitchen, there’s no way of having it child-free, but the bonus here is that we can make it as safe as possible so they minimize any head bumps on sharp corners, jammed fingers in the cabinetry – YOU NAME IT! they will find a way to do it if they can.

Talking to your designer and making sure this is an important design aspect to incorporate is very much achievable while still having the kitchens of your dreams, it may mean having the rounded edges on the bench tops opposed to the square edge or a rounded handle instead of a sharper edged one would be the way to go but the options are super flexible when going through a skilled designer (like our lovely designers here at Next Edition Kitchens!) you often won’t pick up on what else needs to be discussed but the knowledge the designers have is incredible and will have you walking away feeling like you’re in great hands as are your children.

Keep in mind, there are many little gadgets you can purchase to assist the safety in the kitchen if you aren’t designing or renovating. Click here for ideas.

Appliances Blast Back To The Past

As you may know, I am a sucker for a good history throwback and seeing how much we have changed and evolved from back then.
Come the holidays, we always start to spend as much quality time as possible with loved ones, especially in the kitchen preparing the mouth-watering lunch and dinner for all. This year round made me really think about what it was like when my mother was me helping her mother prepare the delicious feast and what sort of appliances and cooking utensils they used.

Upon my conversation while cooking with my mother about what it was like back in the day really got me interested in doing some research and WOW, did the results just become the most interesting find yet?!

While the traditional pavlova recipe or nana’s special fruit cake recipe remains, the appliances they used to use to whip these up have majorly shown such a difference when comparing what we use today VS. what our loved ones used when they were little.
Let’s dive in and explore some exquisite finds that really WOW’d me:

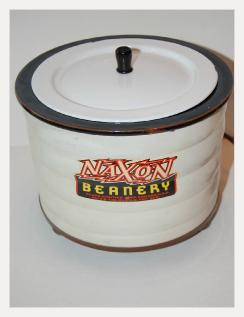
1. The Naxon Beanery – This was every households necessity (no, seriously – this appliance was the bee’s knees, so versatile and easy!) We know this to be the “Crock-Pot” this was developed by Irving Naxon as a means of recreating his Grandmothers bean soup, the Beanery was transformed into a more versatile status appliance which was then seen overall as a slow cooker. In 1971, the Chicago-based manufacturer was bought out Rival, who renamed the plug-in pot the Crock-Pot.

Naxon Beanery

Naxon Beanery


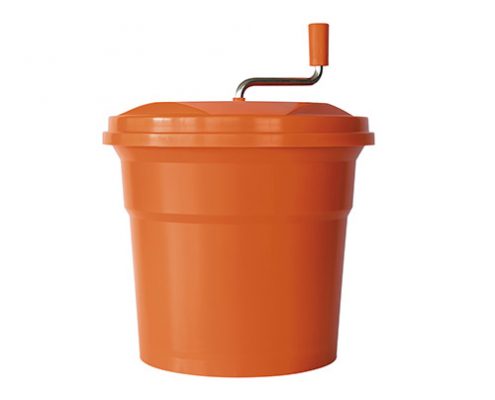
2. The Salad Spinner – As you may have already noticed that you still have one of these in your cupboard and it isn’t quite an out-dated utensil – this one is still such a great invention, my mother advised that this would come in pastel/fanta colours and pastel greens and it would be her or her siblings job to sit on the floor and spin the handle like mad until the lettuce was dry. Not only were the colours fun but also it did resemble a toy as such which made it easier to convince the kids to help out!

Salad Spinner

Salad Spinner


3. The Ice Crusher – It’s no secret that cocktails where all the rave and at its peak in the 1950s. Here, we have the handiest device that would crush your ice cubes to make a lovely, cool & refreshing slushy-like beverage.

Ice Crusher

Ice Crusher


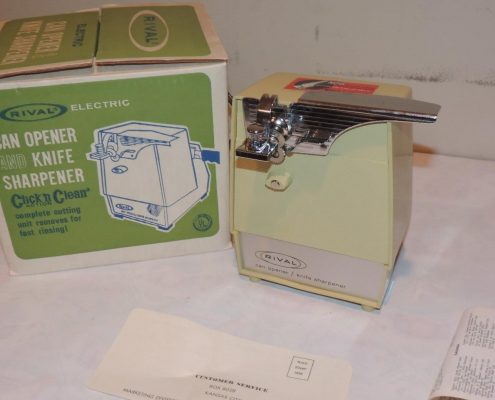
4. 2-in-1 Electric Can Opener and Knife Sharpener – First of all, how did these ever go out of fashion? Seriously, how great is this invention. It is super practical and easy to store for when you don’t need it. It did used to have a horrid grinding noise when you would sharpen knives but for the design of this beauty, chuck in a couple of ear plugs and get sharpening your knives and opening your cans with ease & style! (It was even electric!)

Electric Can Opener & Knife Sharpener

Electric Can Opener & Knife Sharpener


5. Elevated Cabinet Fridge – Wait, did you say HANGING FRIDGE? Another design I’m totally in love with for what it used to be, I think this design was a very practical idea to have all food being incorporated into the layout of cabinets opposed to free-standing, you’d have to have some strong screws in there to hold it up!

Elevated Fridge

Elevated Fridge


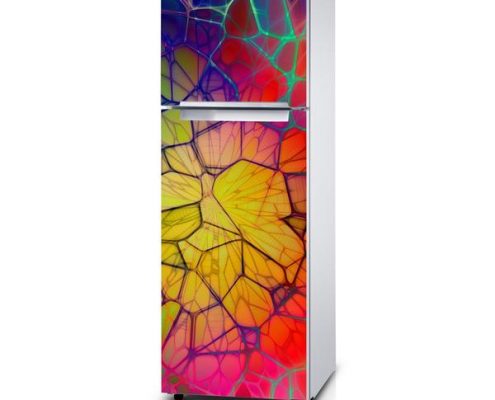
6. Fridge Wraps – Ever looked at a white fridge and thought “You look a wee bit plain, lets spruce you up!) well, our family living in the older generation hit the nail on the head with a range of patterned designs to stick on the doors of your fridge, retro right?!

Fridge Wrap

Fridge Wrap


The list goes on & on & on for so many cool, older style appliances and even cooking utensils. It really does amaze me of how much we have evolved into what we use today and the style of things, hearing about my mothers childhood cooking stories and all the different things you don’t see so much anymore is truly eye opening so i hope you enjoy this post and it takes you or your elders back in time to reminisce.


*All photos are NOT owned by Next Edition Kitchens.

Countdown NZ Spinach & Feta Scrolls (Summer Fave)

Not all delicious recipes have to come from Nana’s hand written cookbook with the flour, milk and cocoa splatters throughout the pages, although nothing will ever beat her golden recipes this sure does come close.

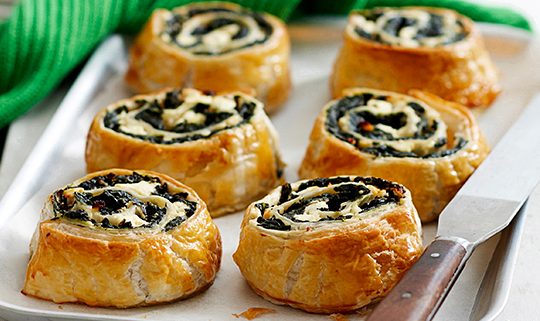
Spinach & Feta Scrolls – perfect for the kids lunch boxes and also just as a snack or a great addition to that BBQ you have been invited too..

Here’s what you need to make this mouth-watering meal:

  • 1 1/2 Sheets frozen puff pastry, thawed.
  • Spray cooking oil.
  • 250g Baby spinach.
  • 100g Crumbled feta cheese.

Method

1. Preheat oven to 200°C (180°C fan-forced). Line a large oven tray with baking paper. Join pastry sheets, overlapping them by 1cm and pressing together to join. Place pastry over the baking paper.

2. Spray a medium sized frying pan with oil. Place spinach in the frying pan and sauté over a medium heat for 1-2 minutes, or until just wilted. Transfer to a colander and squeeze out excess moisture. Spread spinach over pastry, leaving a 3cm border around the edge. Sprinkle feta over top.

3. Brush pastry edge with a small amount of water and roll up loosely. Cut into 6 equal rounds. Arrange the rounds with the cut-side up on the baking tray. Bake for 15-20 minutes or until the pastry is crisp and golden.

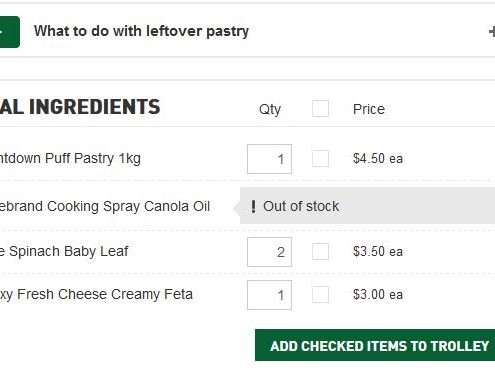
I love countdown for many reasons but if you browse the hundreds of recipes on their website (www.countdown.co.nz) it actually generates a shopping list below the recipe in which it gives quantities and the amount of food you need to complete the recipe – SO EASY! There is also many different meals/drinks/appetizers based upon the event or season to browse recipes from, it’s a great tool and the food never fails to disappoint, the kids will love it too.


Countdown shopping list - Feta & Spinach Scrolls

Countdown shopping list – Feta & Spinach Scrolls


What are you waiting for? lets start summer with a bang (and a yummy, easy, affordable meal).


(Image & Recipe from www.countdown.co.nz)

A brief history about the kitchen

Today i wanted to take everyone back to the very first kitchen and the history of how we have evolved into today’s design. Everyone knows or may have seen the bright, funky colors and basic, similar designs kitchens where a few decades ago (in my opinion, i love modern but i also love retro and original! so evolving into the styles and trends of today was and still is very exciting for me) and we’ve all seen and heard of the newer kitchen designs dated as of today, the future designs really interest me.

Get comfy, make a hot tea and be prepared to see the timeline.

  1. THE ORIGINS – Back in ancient times and I’m talking years and years ago, our ancestors cooked on open fires that were constructed outside on the flat ground, later on they had an idea to construct something that would hold pots and pans above the heat instead of holding them, themselves. they had come up with a simple, masonry design which was put in place to hold the handles of the pots and pans etc. In this era, the food was often placed in metal cauldrons that were hanging above the fire. These cooking areas naturally caused people to gather as they were the primary source of heat, light, safety and of course, food. The smoke and soot let off from the fires were a HUGE problem until the 16th century as it would go everywhere, this is when chimneys came into the mix With a chimney, smoke was drawn up and out of the great hall, making it easier to breath and easier to create large cooking fires in fireplaces. Here’s a picture to show you exactly how it was:
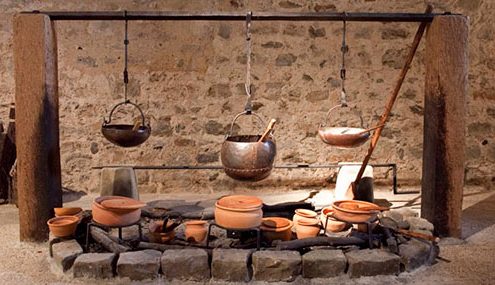
12th Century Kitchen

12th Century Kitchen


2. THE DEVELOPMENT OF STOVES – Moving along to the year of 1735, economic trends and politics had a massive influence on the practicality and design of the kitchen, technological advancements were constant many of which came in effect to minimize the time spent on a meal and the work involved around it, in the 18th century this is where we would find this design to come into effect (still fueled by wood at this stage.) One of the earliest wood-burning kitchen stoves was the Stew Stove (or Castrol Stove) developed in 1735 by the French designer Francois Cuvilliés. An early yet famous example of a metal stove is the Franklin stove (pictured below) which came into effect in the 18th century, invented by Benjamin Franklin (thats right, the guy you see on American $100 bills) in 1742. It had a special guide in place for hot gases to escape, allowing heat to enter the room instead of going up the chimney. However, this stove was designed only for heating, not for cooking – Strange huh?! The industrial revolution encouraged new inventions, cheaper prices, and new ways of efficiency. The most common stove for heating in the industrial world for almost a century and a half was the coal-burning one. Coal stoves came in all sizes and shapes and different operating principles. Since coal burns at a much higher temperature than wood, coal stoves needed to be constructed to withstand the high heat levels.
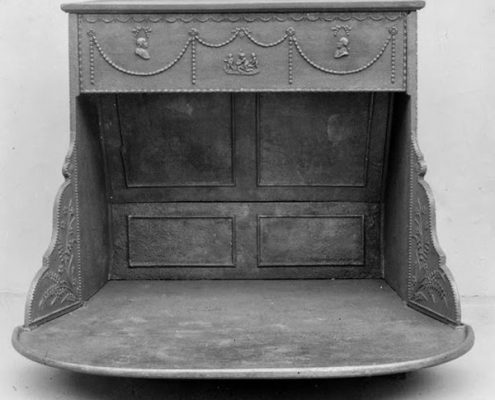
 

1735 - Oven

1735 – Oven


3. THE OBERLIN STOVE – Progressing a little up the timeline to 1834, a man named Philo Stewart took it upon himself to design a compact, wood burning cast iron stove in which was named the Oberlin Stove. this was a metal stove, small enough to use for cooking. It was much more efficient than cooking in a fireplace this is because it had increased cooking temperatures and had the option to record cooking times. It actually blew up and became a major success for Philo,  it could be cast into decorative shapes and forms and could easily withstand temperature swings from hot to cold. These iron stoves evolved into specialized cooking appliances with flue pipes connected to the chimney, oven holes, and installations for heating water.
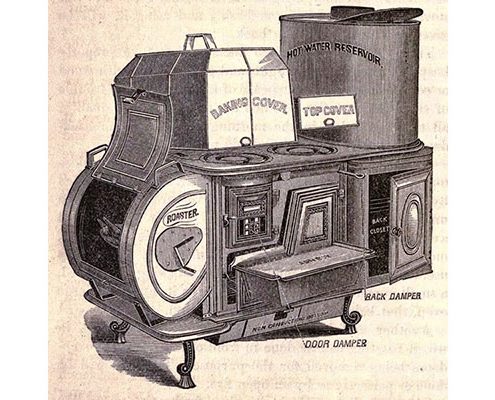
1869 - Philo

1869 – Philo


4. THE MOVE TO GAS STOVES – Complaints and concerns about air pollution from the smoke excretions arose and sent a decline in coal stove purchases way down hill – Gas the became the next best thing. Because they were fueled by gas the production of the oven became lighter and even smaller! the genius British inventor James Sharp gave a big yes to the gas stove invention in 1826. By the 1920s, gas ovens were used in most domestic kitchens and was very rare to see the older ones.
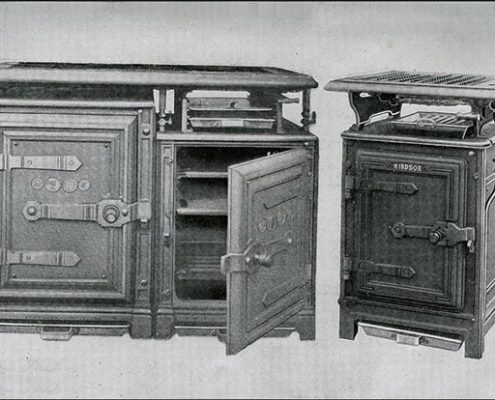
1826 - James Sharp

1826 – James Sharp


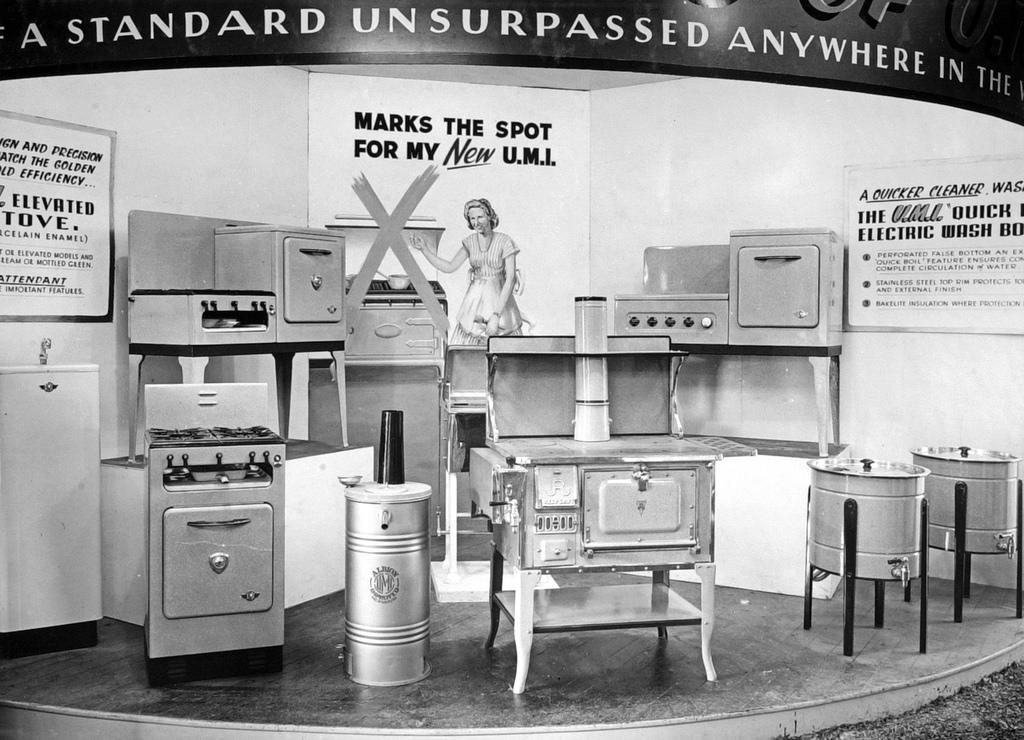
5. THE GRAND APPEARANCE FROM THE ELECTRIC OVEN – This oven caused quite the competition between the Gas stove and itself, this occurred in the 1920’s and 1930’s. The Copeman Electric Stove Company (based in Michigan) received the first patent for an electric stove in 1912. Copeman Electric Stove, 1912 – Mostly wood, it had two ovens, top units, automatic timer and heat control.
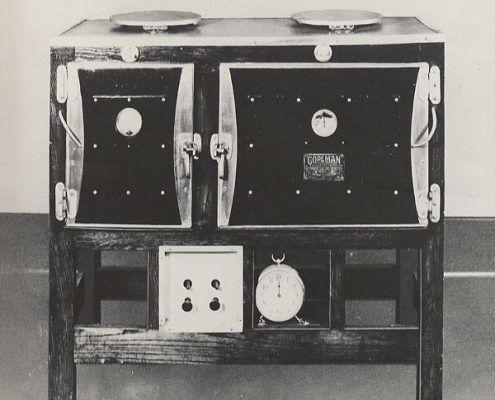
Copeman Electric Stove, 1912

Copeman Electric Stove, 1912


6. MODERN KITCHEN DEVELOPMENT (Post world war #2 onwards…) – The housing and manufacturing development of post World War 2 made a huge effect on what we class as the “modern” kitchen nowadays. There was a major jump in demands for kitchen technology and equipment that inspired homeowners  to rip down the walls that once hid their efficient kitchens. The kitchen was becoming quieter, cleaner, better organized and easier to work in, a sense of pride, and slowly a place to entertain family and friends. In the 1960’s and 1970’s other social changes were taking place that upgraded the style and trend of the kitchen, a renewed interest in home baking/cooking, having a dedicated space for utensils and even entertaining was suitable for having the kitchen be the heart of the home. The kitchen became a place for improving baking skills, displaying fancy (expensive) cookware and becoming the heart for social gatherings. By the 1980’s, the idea of a completely open kitchen with appliances in the open, came into the new idea of design.
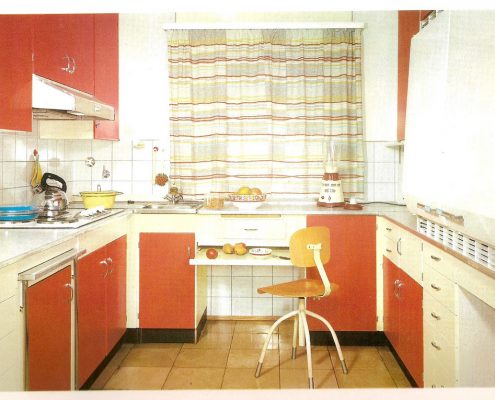
1960's - Kitchen

1960’s – Kitchen


7. CONTEMPORARY KITCHENS – Today’s ovens have evolved into more time, health and energy efficient, our appliances are finally catching up with our fast moving lifestyles, speed ovens for instance, cuts the cooking time in half which actually saves energy used during meal preparation The kitchen doesn’t look like the kitchen, in the traditional sense. It’s now a clean space, with a full range of sleek appliances looking towards a sustainable future. Only up from here and we’re excited to see what the future brings.
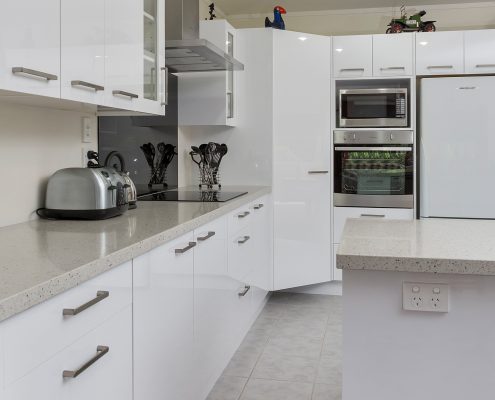
2018 - Kitchen (Next Edition Kitchens)

2018 – Kitchen (Next Edition Kitchens)

Oven

How to clean your oven naturally

Today I am inspired to write this blog as my oven is in dire need of some TLC – I did some research on how important this is and the results where mind blowing, I had no idea how regularly you theoretically should be “maintaining” your oven. It seems to be one of those things that “you’ll get around to that tomorrow” and tomorrow turns into the next day, and the day after that and so on but let me remind you how important this is!

My first question I had when I opened my oven last night was “when did I even last clean this?” my answer was struggling to come to mind, it must have been a good 4 months ago (not so bad, right?!) well – WRONG! Here my next question came, how often are you supposed to clean your oven?

Once. Every. Month. HOW BIZARRE! Of all the years I have been in charge of that sort of thing, I never even realized there was actually a time period on how often you should be doing it.

Why is there a time on this? I get the hygiene side of it but what’s the actual history behind this? Simple, your oven can become less efficient at reaching temperatures and eventually may just stop working all together if burnt food/build-up is left unattended.

Crusty build up can also impact the taste of your food and, while high temperatures can kill some bacteria, it’s not a good place to be cooking food (like I said, hygiene)

So, now that I’ve got you itching to go have a look at your ovens – I also have a natural guide on how to clean your oven without even turning it on, this method is super easy and really cost efficient.


What you will need:

  • Baking Soda (1/2 cup)
  • Water (to make a paste)
  • Rubber Gloves (Preferably durable, non-disposable ones)
  • Damp dishcloth
  • Spray Bottle
  • Vinegar (White)


Instructions:

  1. Clear out the oven

Take out all dish-racks (clean those as well) make sure everything is removed so you have access to get deep in the back of the oven to clear that build-up.

  1. Mix the paste

In a small bowl, mix a 1/2 cup of baking soda with a few tablespoons of water. Adjust the ratio of both as needed until you have a spreadable paste.

  1. Coat the oven

Spread the paste all over the interior surfaces of your oven, steering clear of the heating elements. Use gloves for this portion, as the oven may be pretty gunky. The baking soda will turn a brownish colour as you rub it in; it also might be chunkier in some places than others, which is fine. Just try to coat the whole oven to the best of your abilities, paying extra attention to any particularly greasy areas.

  1. Let it sit overnight

Allow the baking soda mixture to rest for at least 12 hours, or overnight.

  1. Wipe the oven out

After 12 hours or overnight, take a damp dish cloth and wipe out as much of the dried baking soda paste as you can. Use a plastic spatula to help scrape off the paste as needed.

  1. Spray a little bit of vinegar

Put a little vinegar in a spray bottle and spritz everywhere you still see baking soda residue in your oven. The vinegar will react with the baking soda and gently foam.

  1. Do a final wipe down

Take your damp cloth and wipe out the remaining foamy vinegar-baking soda mixture. Repeat until all the baking soda residue is gone. Add more water or vinegar as needed while wiping to really get the oven clean and shiny.

  1. Replace your clean oven racks

Replace the oven racks and anything else you keep in your oven, and you’re done!


Go give that oven some TLC – You’ll thank yourself later.

Casserole/stew

Winter’s Beef Casserole

Don’t just warm your tummy – warm your soul as well! this recipe is a MUST for these winter chills.

  • 600g chuck or gravy beef.
  • 1x onion, sliced.
  • 2x medium carrots, sliced thinly.
  • 2x Tbsp plain flour.
  • 3x cups beef/vegetable stock.
  • 1x tsp Worcestershire sauce.
  • 1x Tbsp soy sauce.
  • 1 Tbsp thyme.
  • 2x bay leaves.
  • 2x tsp garlic.

Preheat the oven to 180°C.

Cut beef into cubes/strips.

Season with salt and pepper, add about 2 tablespoons of oil and mix well.

Heat a large fry pan over a medium-high heat. Brown the beef in batches then place in a casserole dish.

Reduce heat in pan, and sauté the onion and carrot in butter. Cook for 1-2 minutes, stirring occasionally.

Sprinkle in flour and stir until the vegetables are coated.

Gradually pour in stock, stirring well. Add the remaining ingredients and bring to the boil. Pour into a casserole dish, cover then place in oven and cook until the beef is tender. Stir every 40 minutes or so, adding water if needed to keep the ingredients just covered. (Roughly cooking time is 2hrs and 30mins but will depend on different types of ovens and temperatures)

Smart tip: This casserole can be cooked on a stove top or slow cooker.

Stove top method: Place the browned beef and other ingredients in a heavy-based pot. Partially cover, keep the heat low. Simmer until the meat is very tender. Stir occasionally, adding water if needed to keep ingredients just covered.

Slow cooker: Place the browned beef with other ingredients into the slow cooker and place onto low for 6 hours or until the meat is tender. Depending on size and cut this can take up to 8 hours.


Granite

All you need to know about Granite

Tough, practical, beautiful.. no wonder Granite is the top choice for stone benchtops..

For those who are interested in granite, granite is an igneous rock with between 20% and 60% quartz by volume, and at least 35% of the total feldspar consisting of alkali feldspar, it is a incredible hard-wearing stone (ideal for kitchens) the price ranges from rarity of the stone and where it originates from also the labor involved in manufacturing this to suit any design – makes it more of an investment than a cheap fix.

Granite is produced naturally in a variety of colours this will always depend of the mix of quartz, mica & feldspar.  So, a wonderful range to choose from!

To achieve different finishes, the stone’s surface is worked with diamond pads, starting with the roughest and getting finer until the required look is produced. A high-shine, polished finish brings out the brilliant colours and shine which comes from the reflection of the stone’s crystals.

For a contemporary honed finish, polished stone is buffed to create a flat, low-sheen surface. Sandblasted granite gives a raw, textured surface. This is more porous than a polished surface and is not suitable for hardworking areas.

Clean granite with stone soap or a mild dish-washing liquid diluted in warm water. Use a clean, soft cloth, remove the detergent from the surface with a second cloth soaked in cold water, then wipe dry. Blot up any spills before they soak into the surface


Now, you’re probably wondering what the pro’s and con’s are to this magnificent product? well here goes:

PROS:

  •              Granite benchtops don’t d­epreciate in value.
  •            It’s a one-of-a-kind, natural surface that has an almost luminous look.
  •             Granite adds value to your home.
  •            It’s sanitary — bacterial contamination is not a problem with granite.
  •             Formed by heat and pressure, it can take the heat of a pan.
  •             It’s easy to clean with warm water and a mild detergent.

CONS:

  •         Granite benchtops last forever. If you get tired of the colour, you’ll either need to learn to live with it or rip out the entire counter, because you can’t change the colour.
  •          Each slab of granite is different, so it may not be a good choice if you prefer a completely uniform look.
  •          Granite itself is expensive, and the labor-intensive installation can run three times more than the cost of the material.
  •          Granite can be permanently stained if you seal it with a pre-existing stain.
  •          It can crack when hit by a hard, sharp object like a meat cleaver.
  •         Because it’s so heavy, granite often requires additional structural support, especially in spans and cantilevers.
  •          Once glued onto the cabinets, granite is quite difficult to remove, and may result in damage to the cabinets.

Here’s a link to our main supplier of granite benchtops – here you can browse through the different colours and find out where they are from, there also some finished projects on there too (don’t be afraid to pop down to their showroom and have a chat! they won’t bite!) https://www.stone.co.nz/