Posts

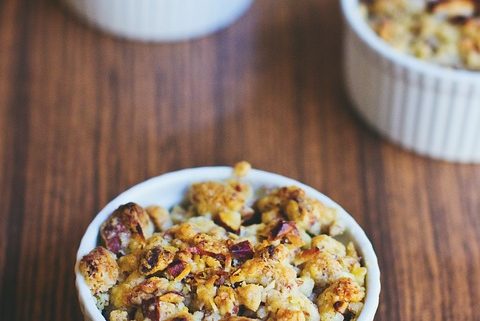
Delicious, Tummy-warming Apple Crumble

Delicious, Tummy-warming Apple Crumble

After a quick, cheap evening treat for after dinner? i bet you probably have all the ingredients in your household as the recipe is SO SIMPLE and just absolutely a family favorite to warm your bellies in this cold winter chill.

  • ½ cup plain flour
  • ¼ cup rolled oats
  • ¼ cup desiccated coconut
  • ¼ cup Soft Brown Sugar
  • ½ tsp cinnamon
  • 75g butter
  • 5-6 Apples
  • 2 Tbsp Golden Syrup
  • 2 Tbsp Raw Sugar

Preheat oven to 180°C on fan-bake.

In a large mixing bowl, mix together the flour, oats, coconut, brown sugar & cinnamon all together and the rub the butter into the mixture with your hands until it becomes crumbly.

Peel and cut the apples into thin slices (not too thin!) and place them in the oven proof dish – drizzle some golden syrup over the apples.

Spread the crumble mix evenly on top of the apples to completely cover the oven dish and sprinkle your raw sugar over the top to give it the caramelised taste.

Cook for 30-40 minutes or until the apples are cooked. Serve with vanilla bean ice cream, freshly whipped cream or warm custard for a delicious winters desert!

TIP* Add in some additional fruit with the apple, plums, peaches, pears or mixed berries would complement this just superbly!  

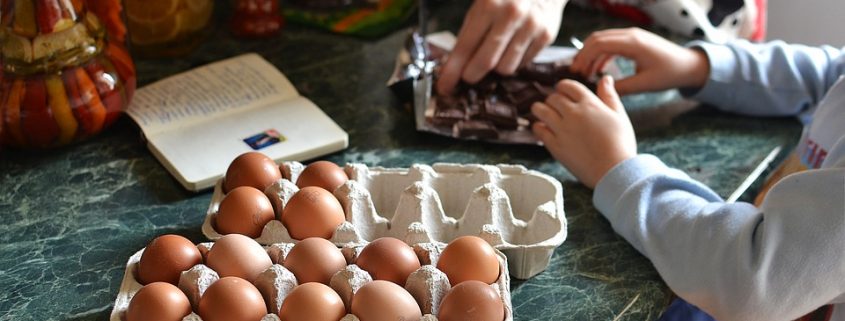
Children cooking in the kitchen

Keep the Kitchen child safe

When it comes to getting a new kitchen, we often forget about the wider aspects to the design process.

Children can play a major part in the design process – particularly the younger ones. They are very compelled by the kitchen and are heavily enticed from all the colourful things you put in and take out of cupboards, drawers & the fridge.

Kids love to be wherever you are – INSTANTLY if they see you’re about to do something they want to help with and we all know they love baking/cooking (i’m pretty convinced it’s because they get to have multiple taste tests and get the rights to licking the bowl!) this is why it becomes important as they are spending a chunk of time in the kitchen also and it can be a jungle for them in there with so many things to grab and play with.

While you spend quite a bit of time in the kitchen, there’s no way of having it child-free, but the bonus here is that we can make it as safe as possible so they minimize any head bumps on sharp corners, jammed fingers in the cabinetry – YOU NAME IT! they will find a way to do it if they can.

Talking to your designer and making sure this is an important design aspect to incorporate is very much achievable while still having the kitchens of your dreams, it may mean having the rounded edges on the bench tops opposed to the square edge or a rounded handle instead of a sharper edged one would be the way to go but the options are super flexible when going through a skilled designer (like our lovely designers here at Next Edition Kitchens!) you often won’t pick up on what else needs to be discussed but the knowledge the designers have is incredible and will have you walking away feeling like you’re in great hands as are your children.

Keep in mind, there are many little gadgets you can purchase to assist the safety in the kitchen if you aren’t designing or renovating. Click here for ideas.

Composting

How-to: Maintain a compost bin

Do you have a garden and have been thinking of incorporating a good ole’ compost to the mix? this is such a great idea if you are after a little project to keep you busy and an added bonus is that your garden will thank you with delicious fruit, vegetables and flowers that have been absolutely soaking in all the nutrients from the emptied compost.


What exactly is compost?

Compost is simply decomposed organic waste from mainly food scraps. It is nature’s way of creating an added boost to crops and general gardens. All you need to keep feeding your compost is your kitchen food scraps and even garden waste – how easy? in just 2 – 3 months your supply will be at the stages of an ongoing steady fertilizer that’s packed with nutrients for your garden.


What type of compost bin is best?

A plastic bin in which you can purchase from your local hardware shop is perfect for your smaller compost to scale but if you are wanting a larger to scale bin, go for the wooden ones. You can build a bin yourself from googling a DIY step-by-step guide. You can also just start a heap on the ground but the choice is totally up to you!


Where do i place my bin?

It is a good idea to place the bin in place away from the house. it will need to be sheltered by intense heat and wind.


Making the compost:

Once you’ve decided where you’re going to place your compost bin, it’s time to get started with the fun stuff.
Add your organic material in layers to create a balance of carbon and nitrogen.
Start by doing a layer of carbon – your brown material: dried leaves, twigs, newspaper etc. Next add a nitrogen layer – your green material: plant trimmings,
grass clippings, anything green and leafy.
Adding a product like lime to each layer as you prepare your heap will accelerate the composting and help neutralize acidity, plus it has the added bonus of helping to keep flies away. Keep adding alternate layers, then add water and cover the heap to enable it to decompose quickly. Compost needs to be turned regularly to aerate and help the decomposition process.
What NOT to put in your compost:
-Tea and Coffee Bags: If you are wanting to place Tea and coffee grounds into your compost, that is absolutely fine but please make sure you do not put the bags in aswell – these bags generally contain synthetic fibers that do not break down in a compost pile and can contain some iffy chemicals you do not want in your soil.
Citrus Peels & Onions: While fruit and vegetable scraps are the main ingredient to making some fantastic fertilizer there are some food scraps you should steer clear from your compost, these include Orange peels & Onions the reason i place these in bold is because it is such an easy food scrap to slip past you and weasel their way into the compost bin, perhaps placing a sign on the compost bin to remind you not to put them in would be beneficial?
Unfortunately, the natural chemicals and acidity in orange peels and onions can kill worms which of course slows the process down as the little worms and other microorganisms actually really con tribute to the outcome of your compost. Plus, unless you take time to cut everything down into smaller pieces – they take longer to decompose which results in a longer wait until you can use your fertilizer.
Meat & Fish: These will of course, decompose fine and have nutrients that would be a good addition to your soil, it will unfortunately attract rodents like Mice, Rats, Cats, Dogs etc who would carelessly ransack your bin to eat them.
The smell of decaying meat may annoy you and possibly your neighbors as well!
Coal ash: The ash left from the fireplace should most certainly not be added to your compost pile, it contains quite a significant amount of sulfur as to make the soil excessively acidic, which we can confirm will harm your plants. Wood ash can be added in small amounts but do not add coal ash!
Sawdust from TREATED wood: While untreated, natural wood sawdust can be a great addition to your compost pile. The reason that treated, polished and vanished wood is not a great addition is because the toxic compounds wont be able to break down in the compost process and can negatively affect the microorganism activity and plant health.
-Large branches: Large branches and twigs will take forever to decompose which in conclusion will slow down the process, it may be a bit of a pain to lengthen the process by cutting them down to be smaller but it will allow you to use the compost for your garden a lot quicker. The smaller the branches, the quicker the breakdown cycle is.


Alternatively,  you can start a branch pile at the back of your house where its purely dedicated to branches, twigs etc which will decompose over the course of a couple of years. A branch pile is however, a great habitat for smaller rodents.


Added on tips:

  • Always keep your pile damp but not saturated.
  • If you are adding food scraps bury deep in the pile.
  • Do mix your lawn clippings with your food scraps, grass tends to compact which may prevent the air flow through the pile.
  • Ensure you compost gets some sunshine but not too much.


Countdown NZ Spinach & Feta Scrolls (Summer Fave)

Not all delicious recipes have to come from Nana’s hand written cookbook with the flour, milk and cocoa splatters throughout the pages, although nothing will ever beat her golden recipes this sure does come close.

Spinach & Feta Scrolls – perfect for the kids lunch boxes and also just as a snack or a great addition to that BBQ you have been invited too..

Here’s what you need to make this mouth-watering meal:

  • 1 1/2 Sheets frozen puff pastry, thawed.
  • Spray cooking oil.
  • 250g Baby spinach.
  • 100g Crumbled feta cheese.

Method

1. Preheat oven to 200°C (180°C fan-forced). Line a large oven tray with baking paper. Join pastry sheets, overlapping them by 1cm and pressing together to join. Place pastry over the baking paper.

2. Spray a medium sized frying pan with oil. Place spinach in the frying pan and sauté over a medium heat for 1-2 minutes, or until just wilted. Transfer to a colander and squeeze out excess moisture. Spread spinach over pastry, leaving a 3cm border around the edge. Sprinkle feta over top.

3. Brush pastry edge with a small amount of water and roll up loosely. Cut into 6 equal rounds. Arrange the rounds with the cut-side up on the baking tray. Bake for 15-20 minutes or until the pastry is crisp and golden.

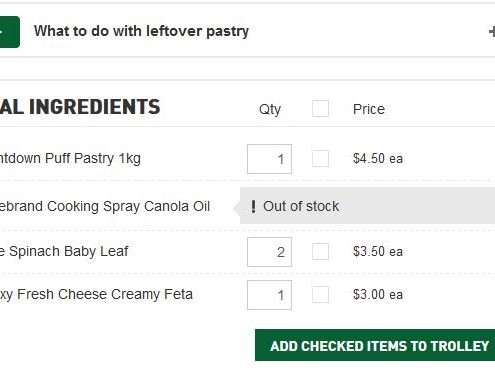
I love countdown for many reasons but if you browse the hundreds of recipes on their website (www.countdown.co.nz) it actually generates a shopping list below the recipe in which it gives quantities and the amount of food you need to complete the recipe – SO EASY! There is also many different meals/drinks/appetizers based upon the event or season to browse recipes from, it’s a great tool and the food never fails to disappoint, the kids will love it too.


Countdown shopping list - Feta & Spinach Scrolls

Countdown shopping list – Feta & Spinach Scrolls


What are you waiting for? lets start summer with a bang (and a yummy, easy, affordable meal).


(Image & Recipe from www.countdown.co.nz)

Casserole/stew

Winter’s Beef Casserole

Don’t just warm your tummy – warm your soul as well! this recipe is a MUST for these winter chills.

  • 600g chuck or gravy beef.
  • 1x onion, sliced.
  • 2x medium carrots, sliced thinly.
  • 2x Tbsp plain flour.
  • 3x cups beef/vegetable stock.
  • 1x tsp Worcestershire sauce.
  • 1x Tbsp soy sauce.
  • 1 Tbsp thyme.
  • 2x bay leaves.
  • 2x tsp garlic.

Preheat the oven to 180°C.

Cut beef into cubes/strips.

Season with salt and pepper, add about 2 tablespoons of oil and mix well.

Heat a large fry pan over a medium-high heat. Brown the beef in batches then place in a casserole dish.

Reduce heat in pan, and sauté the onion and carrot in butter. Cook for 1-2 minutes, stirring occasionally.

Sprinkle in flour and stir until the vegetables are coated.

Gradually pour in stock, stirring well. Add the remaining ingredients and bring to the boil. Pour into a casserole dish, cover then place in oven and cook until the beef is tender. Stir every 40 minutes or so, adding water if needed to keep the ingredients just covered. (Roughly cooking time is 2hrs and 30mins but will depend on different types of ovens and temperatures)

Smart tip: This casserole can be cooked on a stove top or slow cooker.

Stove top method: Place the browned beef and other ingredients in a heavy-based pot. Partially cover, keep the heat low. Simmer until the meat is very tender. Stir occasionally, adding water if needed to keep ingredients just covered.

Slow cooker: Place the browned beef with other ingredients into the slow cooker and place onto low for 6 hours or until the meat is tender. Depending on size and cut this can take up to 8 hours.


Carrot Cake

Never Fail Moist Carrot Cake

Who likes Carrot Cake? what better time to start making this delicious treat for Easter time?


Ingredients:

  • 3x Eggs
  • 2x Cups brown sugar
  • 1x Cup oil
  • 3x Cups grated carrot
  • 2 1/4x Cups of high grade flour
  • 1/2x Cup milk (Warmed)
  • 2x tsp Baking soda
  •  1/2x Cup walnuts (if desired)
  • 1/2x Cup Crushed pineapple (Optional)

Preheat oven to 160°C bake. Beat eggs and Brown Sugar together.

Add oil then all other ingredients – mix well.

Pour into a large, well-greased cake tin.


Bake for 35 minutes, until a skewer inserted comes out clean.

Stand in the tin for 20 mins then turn out and cool on a cake rack.

Spread with cream cheese icing when cold.


Cream Cheese Icing:

  • 50g Butter- softened
  • 1/2x Cup cream cheese
  • 2x Cups Icing Sugar
  • 1x tsp Vanilla
  • 2-3x Tbsp milk to mix

Put icing on when cake is cool, store in a container in your cupboard to keep moisture.


Feel free to customize this recipe to suit your taste, it’s certainly a family favorite that won’t go to waste!


Cinnamon

Tasty Cinnamon Rolls

I was digging around my recipes and i found this fine little gem, i had made it on the weekend and they lasted all about two days before they were gone out of sight! very popular i will definitely making some more this week! keep reading to find out how to make these tasty Cinnamon Rolls.


For the Dough:

2x Cups self-raising flour

1x pinch of salt

90g Butter (cubed)

2/3 cup of milk


For the Filling:

120g Butter (softened)

4x Tbsp brown sugar

2x tsp cinnamon sugar (or half cinnamon powder and half white sugar)


For the Icing:

1x Cup icing sugar

1 1/2 Tbsp Boiling water


Directions:

1. Preheat oven to 180°C.
2. Sift flour and salt into bowl, then rub chopped butter into flour using your finger tips.
3. Make a well in the centre and add almost all the milk. Mix lightly to make a soft dough (add the rest of the milk if necessary).
4. Knead dough on a lightly floured surface until smooth.
5. Roll out dough to a 25 x 40cm rectangle of 5mm thickness.
6. To make the filling; beat the butter with Brown Sugar and cinnamon sugar with electric beaters until light and fluffy. Spread evenly over the dough rectangle.
7. Roll up dough from the long side and using a sharp knife, slice the dough into 3cm pieces.
8. Place scroll pieces into the holes in a muffin tin, greased tray cut-side up. (Avoid using a baking tray, as the contents will leak/spread).  Cook for 20-30 minutes or until golden.
9. Drizzle with icing.
10. To make the icing; combine Icing Sugar and boiling water in a small bowl beat until smooth.

Get going in the kitchen and give this a tasty treat a try, grab the kids and get them involved – such a rewarding activity that everyone will love!


P.S Take a photo and let us know on our Facebook page how great these were.